Top 3 Vintage Bike Restoration Tips To get a Beautiful Bicycle!
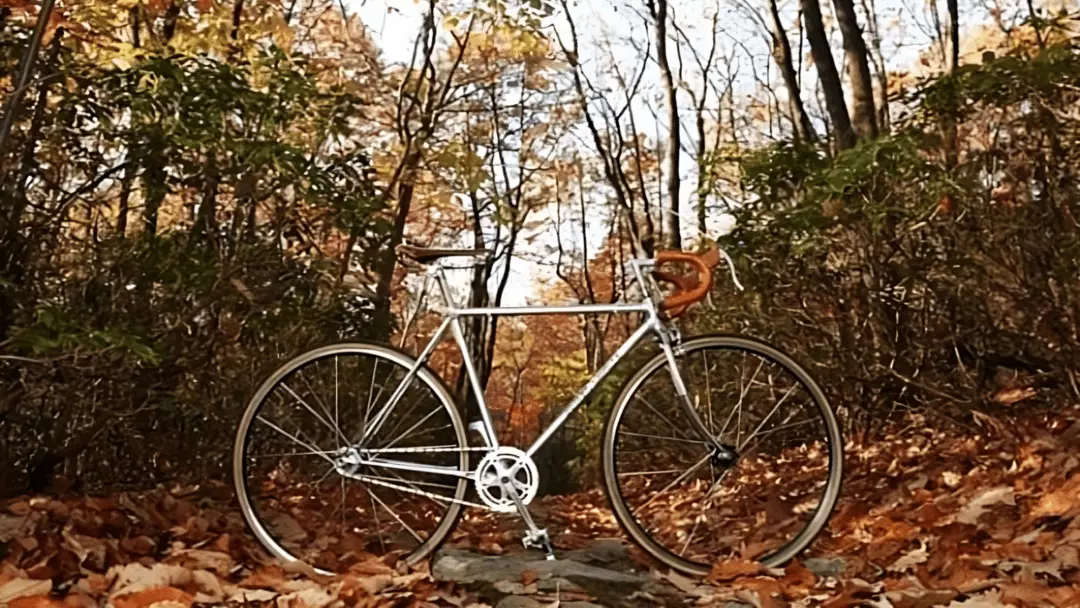
The human eye is a remarkable thing. It picks up on incredibly subtle details, and your brain transforms those signals into snap judgments.
In the case of bicycles, the eye picks out imperfections like a magnet.
Rust, dull or scratched paint, shoddy components: all are identified almost immediately.
If you’re here to learn how to restore a vintage bicycle, I have some good news for you: I know how to trick that judgmental eye.
3 Powerful Vintage Bike Restoration Tips
Performing a beautiful vintage bicycle restoration doesn’t have to be a major project. There’s often no need to tear it down and start from scratch. You can accomplish a very successful restoration and create a vintage style bicycle with minimal investment and effort.
The secret is to focus on whatever is distracting the eye and fix it.
Here are a few simple and quick classic bicycle restoration tips to restore your vintage bike and make it look like a million bucks again (or at least several hundred).
1) Wheels and Rubber: Key to a Beautiful Vintage Bicycle
A lot of people overlook the wheels and the tires of a vintage bike when doing a restoration, and it’s a huge mistake.
Why? Because they’re one of the largest visual spaces on your ride.
They’re really noticeable, and wheels are a prime indicator of a bicycle’s condition. We’re programmed to notice them!
The straightness of the spokes, the shine and condition of the rims, the ‘newness’ of the rubber on your tires; these are all things your brain picks out within a half second.
How you deal with this depends on how stingy you are! The cheapest option is to simply clean up your wheels and tires. You can pick up some tire shine spray at any auto shop, and it works wonders.
Got chrome?
You can do an easy vintage bicycle wheel restoration in a snap with nothing more than a piece of extra fine steel wool. It will remove minor oxidization and make that chrome shine like new. Chrome polish helps too.
If you’re out of steel wool, a piece of crumpled-up aluminum foil can often remove surface rust and polish chrome too.
Sometimes, however, steel wool is just not enough to pull off a convincing vintage-style bicycle restoration.
If the wheels are pitted, wobbly, or seized, you might need to just replace them. The good news is it’s one of the easier components to replace.
New Wheels Breathe Life Into Old Bikes
Getting a set of new wheels and tires will drastically improve the look of your bike. Fortunately, most vintage bikes can be easily upgraded to modern 700c wheelsets without much headache.
The Wheelmaster wheelset shown above is a great example of a classic look alloy set that’s actually technologically modern. This is what I’d suggest for any vintage build, since silver wheels were once ubiquitous, and they blend right in with any vintage bike frame you’re restoring.
It’s amazing how good a modern wheel set can look on a vintage bicycle frame. People will still recognize that it’s a classic bicycle, but the new wheels give it a modern feel.
Beyond that, new wheels give you a lot of peace of mind. Old spokes are weakened, and it’s often impossible to get a vintage wheel set into true. Trust me, that ‘charming’ perma wobble gets pretty old.
If you do opt to upgrade your wheels on your vintage bicycle restoration project, it’s important to understand there may be a bit of tweaking involved. If you’re switching from, say, classic 27″ wheels to 700c, you’ll probably have to adjust the brake pad position a little.
Also, modern wheels tend to have wider hubs, so be sure to do your fork measurements. Forks can stretch a little bit, but you don’t want to overdo it.
2) Mind Your Accessories: Little Things Make a Difference
Any successful vintage bicycle restoration project can’t afford to ignore accessories. They may not seem integral (and they’re not), but they’re noticeable.
I’m perpetually amazed at what a difference a new leather saddle can make to an otherwise tired-looking bike. It’s jaw-dropping!
I highly recommend leather or leather-look accessories for any classic bicycle restoration you undertake.
Natural materials just look better. They age well and stand up to time. They’re also authentic; people in the 40s, 50s, and 60s didn’t have access to the cheap plastic junk we have today. An authentic vintage-style bicycle should have these elements.
Accessories made of natural materials almost always cost more. Waxed canvas, leather, metal and wood will be an investment. That said, they’ll make your bicycle pop and stand out.
Leather Saddles Look Awesome, Become Comfortable
Did you know that a leather saddle is probably the most comfortable seat you can get? They take a while to wear in, but leather forms to fit your body.
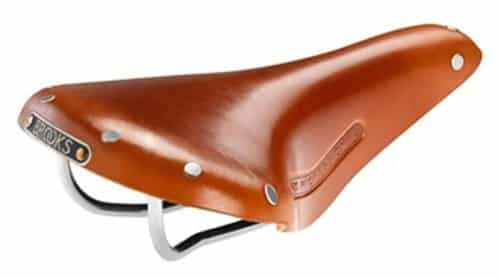
The Brooks B17, pictured above, is probably the most popular of the bunch. Not only is it good-looking, but it’s also absolutely bulletproof.
Think of it like a pair of new leather shoes. The first few days will be unpleasant, but eventually, the hide softens and forms to fit your body.
Your grandpa didn’t use gel padding, and neither should you! Here’s an article we wrote about affordable leather saddles.
There are a few accessories that really make a difference visually: the saddle, handlebar grips/tape, and pannier bags.
3) Elbow Grease: Restoring your Vintage Bicycle Takes Effort
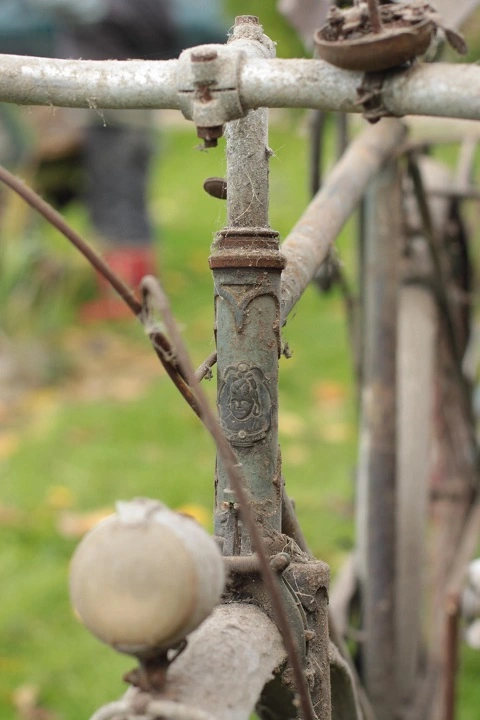
Photo Credit: gregoirevdb
I get annoyed when I see a beautiful bike in shoddy shape. Dirty, rusty, whatever.
It’s sort of like seeing a Lamborghini covered in mud. With a little effort, it could look so good!
The number one thing standing between you and vintage bike glory is dirt. Give your bike a bath.
Next, tackle your rust issues. People who ignore rust speckles on Chrome are just lazy. Grab some steel wool or crumpled aluminum foil and give it a shine.
Lastly, strip off the ‘makeshift’ detritus. I’m talking about stuff like old, half-peeled stickers, ratty bar wrap, electrical tape, and that plastic hanger tab from the U-lock you lost.
For goodness’ sake, don’t use Goo Gone on your paint! It works wonderfully to remove sticker residue, but it also strips off your clear coat. Use it as a last resort, and sparingly.
(Reader Saundra left me a comment below, suggesting you can use a blow dryer to help loosen sticker residue!)
All this junk clutters up your bike visually. Part of restoring vintage bicycles is making them look clean and ‘fresh from the showroom’.
Things to Decide BEFORE You Start Restoring
If you’re planning to restore your vintage bicycle back to like-new condition, you’re probably champing at the bit to get started. That’s great, but I’d caution you to make a game plan before you start.
- Try drawing out what your restored classic bicycle will look like when you’re finished. It doesn’t matter if you’re a decent artist or not. Draw the frame as best you can using a pencil crayons or something for color. If you’re good with Photoshop or another photo editing software, try using that instead. This will give you a good sense of the direction you’re going in.
- Decide early on whether you’re going to do a restoration or a reproduction. Vintage bicycle reproductions are a lot more difficult because you have to make sure you’re using original parts. It can get pricey. I typically like to restore to my personal tastes, and that’s a lot less expensive.
- Decide on paint. You don’t have to paint, but if you do, it makes sense to paint the frame and forks before you get started on anything else. Inspect your frame, analyze the rust, and make a decision.
If you end up doing a bicycle restoration that you’re proud of and want to show off, please consider sharing your story with Bikesmarts. We’re happy to display beautiful bikes, just send us an email.
Vintage Bike Restoration Tips: The FAQs
1. How much does a bike restoration cost?
The cost of bike restoration often differs based on most cases. Depending on the condition of the bike, you have to decide whether you need full refurbishment for your vintage bike or just a part of it. Does the bike restoration need new rims? By taking these factors into account, it will be easier for you to bargain the price of restoring an old vintage bike. Irrespective of the condition of the bike, expect to spend around $40 – $100.
2. Are there different types of brake pads for bike restoration?
Based on the fact that most bikes are rarely the same, there are different types of brake pads you’ll find in the market. The one you choose will be dependent on the type of bike you have. On a broad scale, you’ll find different types of bike brake pads including –
– Rim brake pads
– Disc brake pads
– Front and rear brake pads
– Cartridge pads
– Non-cartridge pads
3. How do you carry things on a bike?
Riding a bike and carrying some loads can be very hectic for a lot of people. For you to carry weighty stuff while riding at the same time, consider buying one of the best vintage bikes with a basket. With this, you’ll be able to carry your groceries or some belongings.
4. Do vintage bikes last?
Unlike modern bicycles, vintage bikes are known for a relatively long lifespan. However, some of the things you should bear in mind are scarcity and high cost. Assuming you want to own a bike with0ut high maintenance costs, you’ll find a good number of vintage bikes that are probably within your budget.
5. Are vintage road bikes worth it?
Though the steel material used in building vintage bikes is usually heavier, its durability and lifespan cannot be compared with today’s mass-produced modern bikes. The only difference is that you’ll need to spend money on vintage bike restoration. By spending money on the upgrade, you’ll be sure of getting what you want from a strong bike.
For more information on how to find a vintage bike worth repairing, please feel free to check out this companion piece.
Thanks for reading!

Steve Beck is a passionate cyclist and experienced writer covering the cycling industry for over a decade. He has a wealth of knowledge and expertise in all bike-related things, from the latest products and technologies to the best routes and trails. His articles are well-researched, informative, and engaging, and he has a talent for explaining complex cycling concepts in a way that is easy to understand. Steve can be found on the road when he’s not writing about bikes, putting his knowledge and skills to the test.


I have what was told to be a Shelby cloud.
Where can I look to see serial numbers
This is a fantastic piece! There is a lot of useful and valuable information in this article that I will save for future reference. Thank you for sharing this fantastic information!
Thanks for pointing out that removing the minor oxidation and making the chrome shine can be achieved by using fine steel wool. I will keep that in mind to keep the chrome in great condition for a long time. I haven’t gotten one yet, but I plan to get one for the bicycle that my father will pass down to me. My plan is to get the forks exchanged since the original material of the fork is quite heavy.
I just picked up a 1954 flying pigeon woman’s bicycle. I don’t want to go about restoration without some input from everyone. I don’t even know what exactly the plan is other than I appreciate the workmanship and want to not screw it up
I am looking to repair my old Idéale 42 saddle. I am trying to track down and old tension pin and shackle. Anyone know where I could look for that bit of hardware?
Thanks
Hello. I recently acquired two rusty and neglected “Sting rays.” One is a Schwinn (purple) and the other a top tube mounted shifter with the chrome chain guard bearing the #2. Head badge says Sears. A lot of rust. I want to clean them up but keep them in the patina condition they are in. Will 0000 steel wool be the way to go? Thanks
Hey man! I am currently stripping a bike and it is torture. I was trying to use chemical strippers but it has been quite a nightmare. What grade sandpaper do you use to get to the bare frame? Thanks!
Hi Tara, yeah it’s a lot of work. You definitely want to remove absolutely every component from the frame. I’ve had success in the past with paint remover and a wire brush, but you’ll need to go over everything several times. After that, you’ll want to prime before painting. If you plan to keep the frame as bare metal, use a clear coat to prevent oxidation.
I purchased a frame from a place in Portland called Embers. It is a Skyrider. I dated it from its emblem to be between 1959 and 1960’s. I found another single speed bike that was whole. Just plain black for 45.00. Tires are perfect and so is the back fender and other parts I need. Using fine sand paper to take all the rust off…have drawn up my emblems to replace them. Taken pics of chain gard. And other white parts. Thi king about getting g a little license plate that says ember on it
I use molasses for rusty components. Depending on how rusty the parts are soak for 2-4 weeks or more. The rust will be gone. Works a treat.
A while ago I was selling my old bike after buying a new one, so I had to remove all the stickers, because some of them had my name on it – and the new owner would probably not like that. I learned how to remove them on the website of the store, where I bought them: https://bikersstickers.com/en/pages/tips-faq.html . As they said, I tried to heat them up a bit using a blowdrier and it went off almost by itself without damaging the original paint. Just something you can try in your case as well 🙂 Btw, thanks for the article.
I lucked up on a 1970 Schwinn. I’m looking for a more natural way to remove the rust off the pedals and exposed metal areas. There are two small spotsof rust on the frame but very minor and I’ll have to find a paint off the same color for it… Everything is original it needs new tires definitely it’s a five Speed the gears and chain are rust free . It works great other than that just wanting to re-touch it keep it as original as possible and ride it.
I have discovered a good way to de-rust components (especially Chrome Plating) is to soak them in white vinegar for 24 hours. Cleaned up a 93 Mongoose BMX by this method. Need a large tray for components like handlebars and a few gallons of vinegar, gallon containers are available in supermarkets. After soaking rub with chrome cleaner and they look like new!!
I have a Gios Compact Pro chromoly road bike that I purchased new in 1996. It has a lot of chrome, including chain stays, fork, and lugs. The chrome is showing its age, not rusty at all, but marred and needs to be rechromed. Can I do this myself, or is it very difficult?
Re-chroming isn’t something I’d DIY, personally, talk to a local paint shop and they’ll give you an idea of your options. But first I’d test fine grit steel wool or aluminum foil. You’d be surprised how shiny and new you can get it to look!
I just purchased an old 1960’s Sears Spyder that i hope to fix up for my daughter. Do you know of any good parts sites? I will probably repaint, but would like to replace the original stickers if i could find them.
Also, any resource that i could trace down exactly what year my bike is?
Hi Shawn, the best parts site I’ve found is eBay. Takes some patience, but you can usually find what you’re after there, or a decent reproduction. As for dating the year of your bike, I’d head over to BikeForums.net, they’re a great resource for that sort of thing!
My wife just bought a 1968 Schwinn. Has lots of rust I’m doing the Coke and aluminum foil to remove rust. My question is how do I bring out the green color in the paint make that look shiny and new again.
Hi Timothy, it depends on how oxidized the paint is, but start by giving it a bath and wipe down, and then try buffing with a good automotive wax, it can work wonders. 🙂
Nice writeup, and a good primer for someone getting started with a restoration.
One suggestion though: using tire dressing on bicycle or motorcycle tires can be a recipe for disaster. Centrifugal force causes the slippery substance to migrate from the sidewall onto the tires contact patch. Lean into that first curve, and watch out.
This is good to know 🙂 I recently purchased a Trek bicycle, I’m pretty sure it’s a titanium frame, but it could definitely use some TLC. I wasn’t sure how to clean the frame, since it’s covered in old stickers, but I’ll take Saundra’s advice and use a blowdryer. Thank you!
hey, i have an old Raleigh bike from err 20? years ago give a decade or so and I want to keep the original wheels as they are good and solid however they are really pitted with rust. Is there anything I can use on them once I clean them up to help prevent further damage to seal them? perhaps some sort of varnish sealant ?
Just completed restoring my 35 year old Knight 531SL road bike ?. Are you interested in seeing the finished bike?
Regards Andy
My 15 year old son and I are restoring an old, rusty bike this summer. Its about as old as he is, give or take. We’ve taken the chrome fenders off and are removing rust with 60 grit sandpaper. Next will be the handle bars and seat shaft. He is soaking the chain and derailleurs in WD40. What’s next? Can I use and indoor/outdoor spray on primer & paint? Do we have to use auto-body paint? What about the tires? They’re beautiful white walls but the rubber is dry. Is that something we can repair? I have so many questions.
Hi Michele, glad to help! First, I’d get a brand new chain if it’s rusted. Second: no, autobody paint isn’t necessary! Spray primer and paint can look nice, thought it takes a long time to cure (harden fully.) Check out Sheldon Brown’s site for lots of good bike frame paint info. As for tires, if they’re dry / cracking there’s nothing you can do, it’s not worth the safety risk. Replace them (and the tubes too) and start fresh.
Hi,
I just got hold of an old puch which is pretty rusty. Do you have any tips for how to get the rust off the paint work without stripping the paint? I don’t want replacing it as the original design is very nice.
Cheers,
Michelle
Hi Michelle, how extensive is the rust? Paint bubbling? A hack I’ve used before: you can sometimes very carefully sandpaper the rust spots and then use a similar colour nail polish to cover the exposed metal.
Something to help with removing stubborn stickers is a blowdryer. The heat from the blowdryer will melt the glue and make the stickers peel off a lot more easier. Heating left over glue residue also makes it easier to wash off.
Hi Saundra, thanks for the blowdryer tip! That’s something I haven’t tried before.