Bike Frames 101 – Everything You Should Know
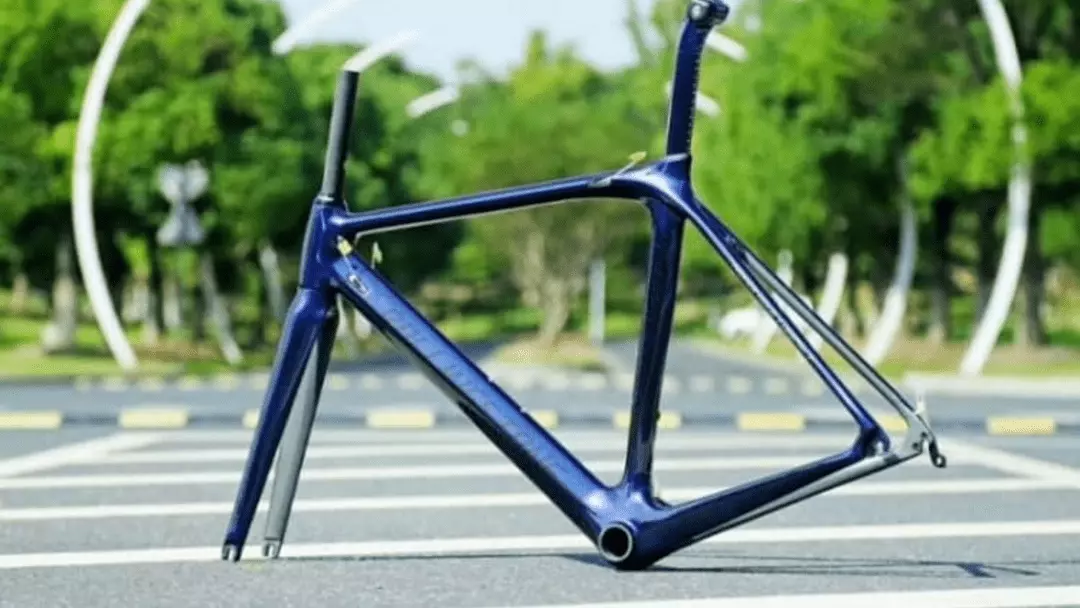
When you’re shopping for bike tires to get a mean ride that’ll help you commute faster to work or have greater traction in the outdoors, don’t neglect taking some time to think about your bike’s frame.
This component plays a crucial role in giving you the ride that you need, whether it’s faster or more durable to handle a bunch of different terrains.
How is a bike frame designed?
You probably know that a bicycle frame is the main piece of a bike onto which other components, like wheels, are attached. Modern bike frame designs consist of two triangles: there’s a main one and a rear triangle.
When picking out your bike, you’ll obviously pay attention to what kind of material the frame has and if it looks good (hey, you want to feel good out there!), but there are other things to know about this interesting bike part.
Let’s start by looking at how bike frames are manufactured, before jumping into how to choose the right frame for your riding needs.
How Is A Bike Frame Manufactured?
The bike frame is the most important part of a bike.
As we mentioned earlier, it connects all the components of the bike – but, it also has to do this in the correct geometric configuration.
This is what gives the bike strength and power, and also plays a huge role in how it’s handled by the rider. A bicycle frame contains the following parts.
Front and rear triangles. The front forms a quadrilateral of four tubes, which are the top, seat, down, and head tubes. The head tube on the front of the frame connects to the fork and steering tube.
The rear triangle, on the other hand, has seat stays, chainstays, and rear wheel dropouts.
To produce the bike frame, frame tubes are made from materials, such as blocks of steel, that are pierced and drawn into tubes. These are called seamless tubes.
On the other hand, when the steel is wrapped into tubes and then welded together, these tubes are known as seamed tubes.
Seamless tubes have many benefits. They can have their thickness adjusted in order to give them more strength as well as a lighter weight, by a process called butting.
This is where the walls on the joints or end of the tube are thickened, as these weak spots are where more stress would be placed on the tubes. The middle of the tube could be thinned out a bit as a result.
Butted tubes can be single-butted (this is when one end of the tube is thickened), double-butted (both ends are thickened), triple-butted (different thicknesses are on either side); and quad-butted (the center is thinned out in the middle).
During a process known as hand-brazing or welding by machine, the bike’s tubes are put together to create a frame. To connect composites, sometimes plastic binders or glue are used during the manufacturing process.
However, most of the frame components are made by machines, and sometimes they can be attached by hand.
After being assembled and cleaned, the bike frame will be painted to create a more finished product but also to give more protection to the frame.
What Are The Frames Of Different Bikes?
As it’s already clear to see, bike frames don’t come standard! Road bike frames will be quite different from mountain bike frames, and frames of other bikes.
Let’s take a look at how and why different bikes will have different frames.
- Road bike frames – These tend to be made of strong yet light materials, with aluminum being a popular one. For riders who compete, they’ll most likely choose frames that are constructed out of titanium or carbon fiber to give them more strength.
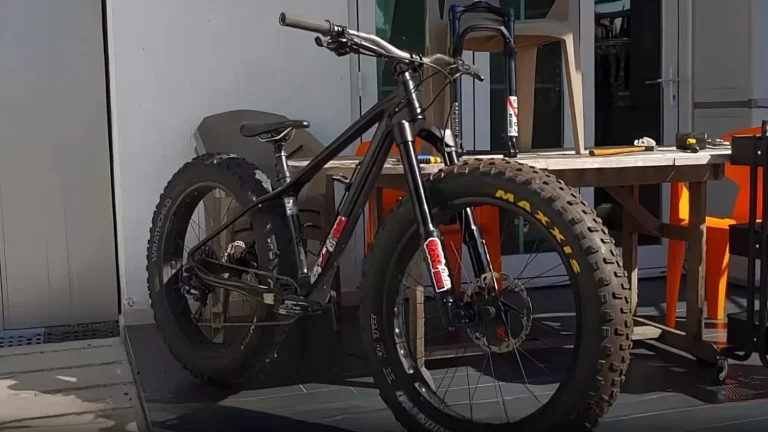
- Mountain bike frames – The frames of these bikes can be made out of aluminum, carbon fiber, titanium, or steel. They’re meant to be strong and durable for a variety of harsh conditions in the outdoors as well as to handle uneven and sometimes damaging terrain. MTB frames will usually be heavy to make them more durable, especially because the goal of these bikes isn’t to achieve speed, as in the case of road bikes.
- A good compromise between road and mountain bikes is the hybrid bike – This one tends to have a frame that’s light in weight, such as that of a road bike, but it will have the comfortable upright riding position of a mountain bike. It’s really the best of both road and mountain cycling worlds!
- Gravel bikes – tend to have slacker head angles which help to provide more stability. You’ll also find longer headtubes on these bikes to give the rider greater levels of comfort. They have strong frames that make it easy for you to attach things to them, such as bags and racks.
How To Choose Bike Frame Materials
When choosing a new bike, you’ll have to choose the best material for the frame.
There are basically four main types of bike frame materials from which to choose: carbon fiber, titanium, aluminum, and steel.
To choose the best material for your frame, you ultimately want to ensure that it’ll be durable and strong, but there are other factors to consider.
For example, do you want one that’s lighter or heavier? Do you want to get a budget-friendly option? Here’s what you need to know about the different bike frame materials.
Carbon Fiber
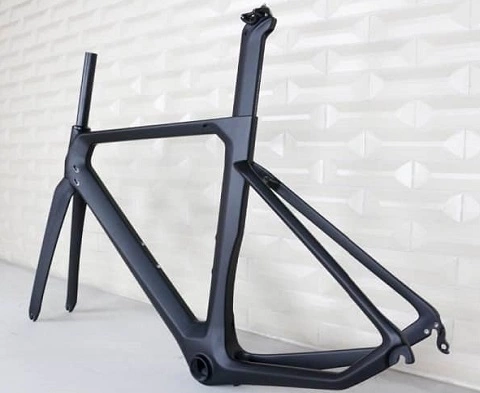
Bike frames that are made out of carbon fiber tend to be used for higher-end bikes. Carbon fiber is a blend of carbon sheets that are bonded together with resin in a mold.
This is what gives the bike frame a lightweight feel. Thanks to their low density, carbon frames absorb more road vibrations, making you feel more in control when riding.
If you like the idea of a unique and aerodynamic bike frame, you’ll love carbon fiber because it can be made into a range of shapes that you wouldn’t find on other bikes.
The downsides? Carbon fiber frames are very expensive. In addition, if they get damaged, even just on the surface, this can lead to structural problems in the bike.
Aluminum
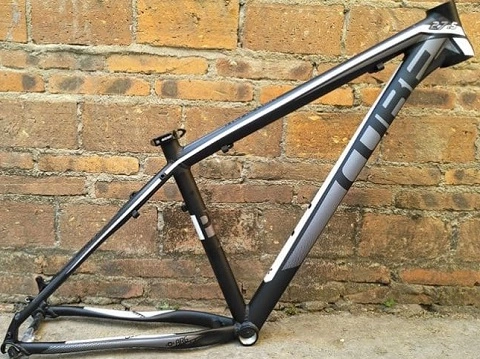
Aluminum is a popular material used in the construction of bike frames because it’s light, strong, and affordable.
It provides good stiffness that makes handling the bike efficient, but it doesn’t absorb road vibrations very well. If comfort is your main priority, then aluminum might not be the best choice for you.
Steel
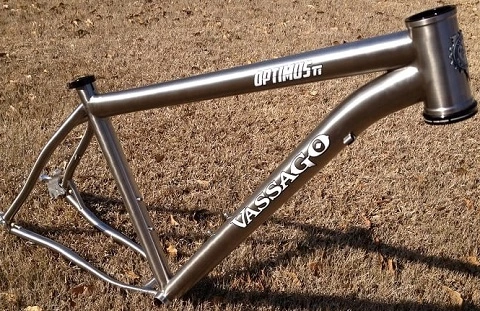
Steel isn’t as popular as it used to be, at least in mainstream bike manufacturing. It’s become a good choice for people who want a custom design, although it can be quite heavy and pricey.
That said, steel is strong, will last a long time, and it can be repaired easier than other types of frames, such as aluminum and carbon fiber. It also costs less to work with it.
Titanium
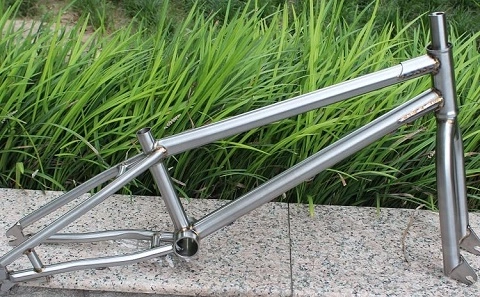
Even more corrosion-resistant than steel is titanium. It’s strong but lightweight. If comfort is a goal for you, then you’ll love that titanium frames are said to offer as much comfort as carbon fiber.
This is thanks to how titanium frames are light but also stiff, so they absorb vibrations on uneven terrain. The downside of titanium, however, is that it’s rare.
This, and the fact that making titanium bike frames is labor-intensive, also bumps up its cost.
What Bike Frame Size Do You Need?
When shopping for a new bike, you might wonder how to find the perfect bike frame size.
You need a frame that will not only fit you but also be appropriate for the cycling you intend on doing with the bike.
Just how are you meant to calculate bike frame size?
To measure your bike frame, you’ll need to measure different parts of it. So, let’s start with how to measure the bike’s top tube length.
This is the horizontal distance that’s between the center of the head tube and the center of the bike’s seat post. You’ll need to use a spirit level for this one!
Why this is an important measurement that many bike manufacturers will determine road bike sizes according to the length of the top tube.
For mountain bikes, you’ll usually find that the frame size will be categorized as small, medium, or large. However, some manufacturers won’t always have the same measurements – “small” to one might be “medium” to another!
To ensure you have the right top tube length, you should measure yourself (asking a friend will probably help!), and then check the below table (via BikeRadar) to find the correct size to fit you.
| Rider Height | Bike Top Tube Length | What size to choose |
| 5’0’’ – 5’3’’ | 49 – 50 cm | Extra Small |
| 5’3’’ – 5’6’’ | 51 – 53 cm | Small |
| 5’6’’ – 5’9’’ | 54 – 55 cm | Medium |
| 5’9’’ – 6’0’’ | 56 – 58 cm | Large |
| 6’0’’ – 6’3’’ | 58 – 60 cm | Extra Large |
| 6’3’’ – 6’6’’ | 61 – 63 cm | Extra Extra Large |
The above measurements are more suitable for road bikes, so what about mountain bikes? This table (via EvansCycles ) provides the right size bike to look for depending on your height.
| Rider height | Frame Size | Suggested mountain bike frame size |
| 4’10’’ – 5’2’’ | 13’’ – 14’’ (33 – 37 cm) | X-Small |
| 5’2’’ – 5’6’’ | 15’’ – 16’’ (38 – 42 cm) | Small |
| 5’6’’ – 5’10’’ | 17’’ – 18’’ (43 – 47 cm) | Medium |
| 5’10’’ – 6’1’’ | 19’’ – 20’’ (48 – 52 cm) | Large |
| 6’1’’ – 6’4’’ | 21’’ – 22’’ (53 – 57 cm) | X-Large |
Measure The Stack And Reach
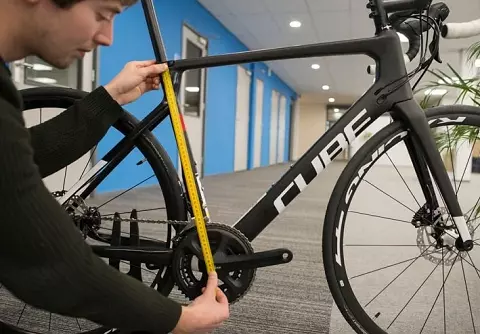
What are the reach and stack of your bike, and why should you measure them?
- The reach will be measured horizontally – starting from the bottom bracket and moving to the top center of the head tube. This will basically tell you how long the bike’s frame is.
- The stack, on the other hand, is measured in a vertical way from the bottom bracket to the top of the head tube. This is important because it tells you how tall your bike’s frame is. A shorter stack will put you into a racer’s position, while a higher one will make riding long distances more comfortable.
Now, there’s a reason why top tube length is sometimes frowned upon – it’s not the most reliable measurement. So, most bike manufacturers now make use of the stack and reach measurements.
These essentially measure the distances between the top of the head tube and the bottom bracket, and what makes it great is that these measurements are independent of the bike’s frame design, which can sometimes be difficult to measure, like if it has curves in it.
To measure the reach and stack, you’ll need a spirit level and plumb line. Put the plumb line on the end of the level. Then, make sure the top edge of the level is in line with the centerline of the top of the head tube.
Move the level a bit until the plumb line intersects with the middle of the bottom bracket spindle, as BikeRadar explains. You want to measure the distance between the plumb line’s top and the head tube.
Got it? That’s your reach measurement.
For the stack, you need to measure the vertical distance that’s between the bottom bracket and the top of the head tube.
How To Find The Right Center-To-Center & Center-To-Top Bike Size
Bike frames are measured along their seat tube in two ways: center-to-top and center-to-center. Here’s how to do both.
Center-To-Center Measurement
First things first, you’ll have to measure your inseam. You can do this by standing barefoot with your back against the wall.
Hold a one-inch book between your thighs, then ask a friend to measure the distance in centimeters from the top edge of the book to the floor. Do this three times to get a reliable reading.
Next, you’ll be able to determine your measurement for a center-to-center measured bike frame (which measures from the center of the top bracket to the center of the top tube) by taking your inseam measurement and multiplying it by 0.7 for road bikes and 0.66 for mountain bikes.
The reason for the difference is that mountain bikes are raised from the ground a bit more than road bikes.
Center-To-Top Measurement
For a center-to-top measurement (on bikes this is the distance from the center of the bottom bracket to the top tube), you’ll multiply your inseam measurement by 0.67. This measurement is for road bikes.
For mountain bikes, you’ll adjust your measurement by subtracting about 10 cm from the center-to-top measurement and converting it into inches. This gives you the measurement for center-to-top mountain bikes.
Other Measurements You Should Take
- Measure The Wheelbase
The wheelbase of a bike is the distance from the spot where the front wheel touches the ground to the spot where the back wheel touches the ground. Why does wheelbase matter?
If a bike has a longer wheelbase, it will be more directionally stable. Bikes with shorter ones will be more responsive when it comes to steering.
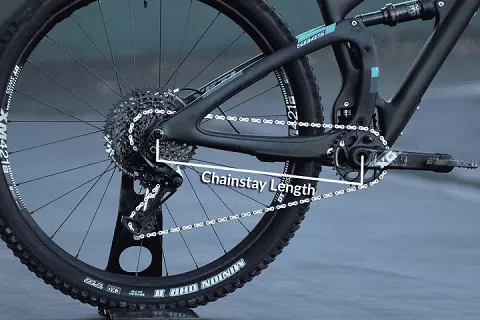
- Measure The Chainstay Length
This will give you insight into how stable the bike will be – longer chainstays give you greater stability. On the other hand, a shorter one will give you snappier handling on the bike (and will have a shorter wheelbase by default).
You can measure the chainstay length horizontally, moving from the bottom bracket to the rear dropouts.
- Measure The Seat Tube And Head Tube
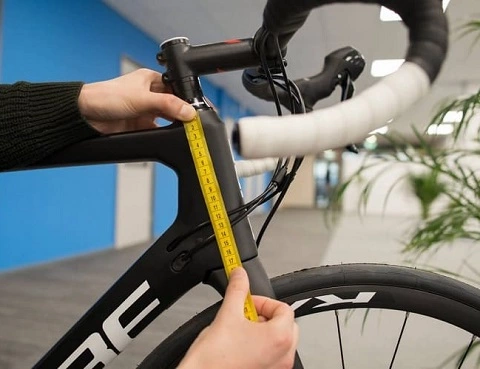
These measurements are important because they will determine the handling of your bike. For a straight seat tube, simply measure the seat tube angle by using the nifty clinometer app on your smartphone.
Just open the app, line up your smartphone with your bike, and read the number that shows up. Keep your bike in a vertical position for the most accurate reading.
Now, what if there’s a curve in your seat tube? Follow the line from the bottom bracket shell to the top of the seat tube, and line up the phone with this straight edge.
Head tube is easily measured from the bottom of the head tube to the top of the head tube. Many new bikes have tapered head tubes.
You’ll want to measure this type by holding your smartphone clinometer app at the angle of the centerline, as BikeRadar reports.
- Measure Bottom Bracket Drop And Bottom Bracket Height
The bottom bracket drop is basically the difference between the centerline of the crank axle and the height of the wheel axles. Get the height of your rear axle and then the height of the bottom bracket.
Subtract one from the other and you’ve got your bottom bracket drop number.
The bottom bracket height is the distance from the center of the bottom bracket shell to the ground. Just make sure you pump up your tires so that they’re at the correct level before taking this measurement as bottom bracket height can be affected by tire pressure.
How To Repair A Broken Bike Frame?
It’s never a good idea to try to fix a broken bike frame.
This can be risky because you don’t have the professional tools and products in order to ensure the highest quality.
Imagine if you try to mend a broken frame, only for it to crack open again when you’re cycling?
It can put your life in danger.
You’ll have to take your bike to a mechanic or shop as a pro will be able to use alignment tools to straighten up a metal frame or even a rigid fork.
Bear in mind that sometimes whatever part that’s busted will have to be replaced. An example is suspension forks.
What About Dents?
If you’ve got a dent on your bike frame, it probably annoys you every time you look at it. But bear in mind that there is some good news: many dents won’t cause any structural damage to the frame itself.
There is a catch, though, when it comes to carbon fiber frames. When these are damaged on the surface, the dents in them could be a symptom of a deeper crack, so always bring your bike to a pro for repairs to ensure that you’re getting to the root of the problem.
If your bike frame is made of steel, the dent can probably be filled out with a brazing material before being painted so that it’ll look good as new.
On the topic of steel frames, you might be tempted to try to repair the dents yourself, like if you’ve watched a video such as one uploaded by a YouTube user called RJ the bike guy.
In this video, grease is applied to the dent and then the bike is clamped between aluminium blocks. Carefully tightening and then using back and forth movements help to roll out the dent.
However, there’s a catch: the dent won’t be completely removed. In addition, this is only said to work on steel, not bike frames that are made of other materials.
If you want to repair a crack on an aluminum bike frame, tread carefully if you’re keen on DIY repairs. Some aluminum needs to be treated with heat after being welded, otherwise it will lack strength.
This needs to be done by a professional to ensure safety and quality repairs. The same goes for titanium, which can be repaired with welding but will require an inert gas shield to prevent oxygen and nitrogen absorption during the process.
That said, there are some resources you can check out if you’re good with bikes and DIY.
This aluminum bike repair video is interesting because it focuses on isolating the crack and then using a clamp to tighten the aluminium so that it compresses the crack. It makes no use of welding.
Of course, there are downsides to trying to repair aluminum, or other bike frame materials for that matter. To be able to isolate the dent or crack, you’ll have to take the bike apart.
This can be a hassle. In addition, you’ll need to purchase items to try to repair the bike, but these might not be high-quality and professional tools.
If you’re not sure what you’re doing you could cause more damage to your bike.
Finally, you’ll probably need a pro to diagnose the true nature of the crack to see the best way in which it can be repaired and if it’s a symptom of a larger problem.
How To Fix Paint Chips On Your Bike?
If your bike frame has spots on it where the paint has come off, these paint chips are not only irritating but they can also lead to other problems – they can cause rust to form on your bike.
If you’re keen on repainting your bike frame, make sure you don’t sand the area where there are chips as this can cause rust problems as many bike manufacturers coat their bike frames with phosphate that prevents rust.
You don’t want to eliminate it. The use of a lacquer thinner is a better alternative to sanding your bike frame. After that, you’ll want to use paint that matches the bike’s color.
If you’re going to take the leap and repaint your bike frame yourself, there are some important things to know.
- You’ll need to disassemble the bike so that you’re just left with the frame you want to repaint.
- Then, remove any stickers that are on the bike. If they’ve left behind a residue, you’ll want to remove that with a spray such as WD-40.
- Wipe down the bike frame with a cloth and some water.
- You might have to sand down the frame so that the paint you use will adhere to it. If your bike’s frame isn’t made out of raw aluminum, steel, or carbon, it will need to be lightly sanded. What sandpaper to choose? Low-grit sandpaper is good for a thick or glossy paint surface, while high-grit sandpaper is best for matte paint.
- Once you’ve sanded it, wipe it clean again to remove any sandpaper particles.
- Use painter’s tape to prevent painting on some areas of the frame, such as the brake posts.
- You’ll need to hang the bike somewhere so that you’ll be able to paint it all around and evenly. You can hang it by looping wire through the bike’s head tube and then hanging this wire from a surface, such as a tree branch.
- Apply primer to the bike frame. This will prevent paint from wearing away.
- Then, apply spray paint of your choice. Whatever paint you choose, make sure it’s a quality product that’s suitable for the bike frame material.
- After painting your bike, leave it in its hanging position for dry for about 24 hours.
- Once it’s fully dried, you can reassemble its parts.
Warning: If you have a carbon fiber bike, you should never use a chemical stripper on it as this will ruin its epoxy resin coating that holds the frame together.
Why Do Some People Only Buy A Bike Frame, Not The Complete Bike?
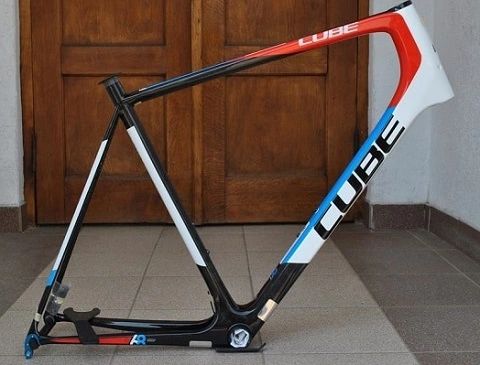
If you’ve ever seen someone purchasing a bike frame instead of a whole bike, you might’ve wondered why they’d do this.
They probably like the idea of building their own bike, and it’s certainly an exciting prospect!
But, wait, you’re probably wondering, “Isn’t it just easier to purchase a complete bike?”
Of course, it is, but it’s not always the right choice for everyone. Maybe you want a more custom-made bike. Maybe you love the idea of being completely creative with your bike parts and fitting different brands onto it.
Frames are cheaper than buying a complete bike, so assembling your own bike could give you the chance to try different things and end up with a completely unique result.
One of the biggest concerns when building your own bike is the effort that’s involved.
However, there are so many online resources when it comes to custom-built bikes where you’re sure to find tons of information and tutorials when you want to build your bike from the frame up.
It might take a bit of time and patience, but you’ll be able to learn tons of skills and you might even enjoy the process.
Another issue concerns the cost of building your own bike. There are ways to cut corners here, such as if you want to use components from an old bike that you still own.
As long as they’re made of quality materials and are still in good condition, there’s no reason why you couldn’t do this. It’s a fantastic way to make use of an old bike that you no longer use and it’ll mean that you’ll have to purchase fewer parts.
When it comes to the tools required to build your own bike from the ground up, you can also find ways to reduce the costs involved, such as by borrowing tools from your DIY friends.
Related Questions
1. What Are Good Tips For Women To Help Them Find The Right Frame Size?
Women usually have longer legs and shorter torsos than men, which means they should generally buy bikes with frames that have shorter top tubes to make their cycling more comfortable.
2. What Bike Frame Material Is Best For Riders Of Larger Weight?
If you’re larger, you should choose a bike that’s built to be very strong. Steel and titanium are both materials that are appropriate for larger riders because they are able to flex without breaking.
Conclusion
There are a lot of factors that go into designing a bike frame.
When you’re out shopping for a new bike, you’ll have to take many frame factors into account before making your purchase, such as when it comes to your height and weight, so that you can choose the correct frame size.
In this article, we’ve not only looked at how to choose the right frame size, but also at different issues concerning bike frames, such as how to fix them after you accidentally dent them, as well as how to repaint them so you can make your bike look good as new again.
There’s a world of interesting discussion surrounding bike frames, from how they’re manufactured to how they can be bought separately from other bike components if you’re interested in building your own bike, and this article covers all the important information you need.

Steve Beck is a passionate cyclist and experienced writer covering the cycling industry for over a decade. He has a wealth of knowledge and expertise in all bike-related things, from the latest products and technologies to the best routes and trails. His articles are well-researched, informative, and engaging, and he has a talent for explaining complex cycling concepts in a way that is easy to understand. Steve can be found on the road when he’s not writing about bikes, putting his knowledge and skills to the test.


