How to Tighten Bike Spokes: 4 Effective Steps
Wheels are the most important component of a bike. Your cycling experience depends on the condition of your bike wheels! For instance, if your bike’s wheels are not straight, they can slow your bike down.
A bike’s wheel naturally bends and can give you a weird, wobbly feeling when it jerks on the road. If this goes unchecked, it eventually stretches the spokes. In order to get optimum performance, you have to tighten the spokes on your wheels once in a while.
However, if you don’t know how to tighten bike spokes, we will let you know about the whole process in detail so that you can easily tighten your spokes. This is a useful skill to have for yourself, especially when your nearby mechanic shop is closed or you are on a trip.
How to Tighten Bike Spokes
A bicycle wheel comprises a hub, a rim, a tire, a tube, and spokes. Spokes keep the rim straight like a circle by maintaining the balance between the hub and the rim.
Before we learn how to tighten bike spokes properly, let’s figure out which tools we will need.
Required Tools To Tighten Bike Spokes
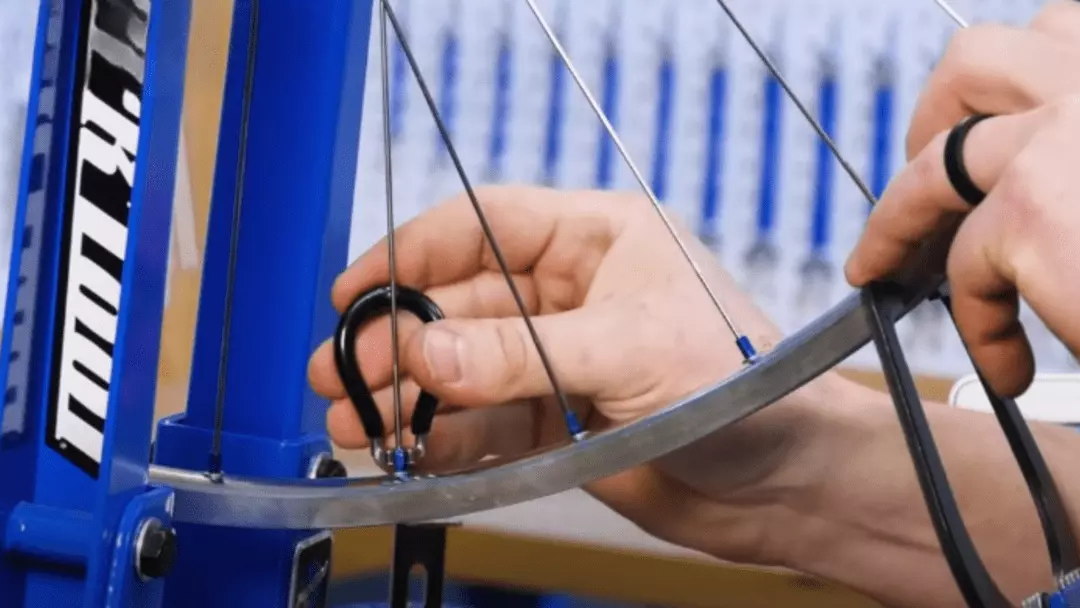
When you are in the spoke tightening process, you will have to use the right tools for it. For tightening a spoke, you will need a spoke wrench that fits your spoke nipple dimension.
You can also get a spoke wrench that fits many different sizes—great if you have multiple bikes!
Along with this, you will need a truing stand for a standard result. This is a simple, small stand for your wheel that can be purchased at retailers. (You can also true your wheel without a truing stand; we will tell you how to do it in the other part of this discussion!)
If you don’t have the right tools, don’t improvise to get things done. For instance, if you use a regular wrench to tighten your spoke, you will not be able to tighten or loosen that spoke with ease.
Using a regular wrench can also damage the spoke’s surface, and that will not last long. Make sure you use the right tool for the right job when tightening the bike spoke.
Now that you have your tools, let’s begin the process:
Step 1: Get Ready with Your Bike and the Tools
In step one, you must remove the wobbly wheel from your bike. You can use a regular wrench to remove the wheel from your bike.
Have your spoke wrench with you, and take a piece of chalk to identify the problematic spoke area. Once you are ready with your wheel and all the tools, you can move to the next step.
Step 2: Set Up Your Wheel for Inspection
Once you have removed the wheel from the bike and got the tools with you, you need to fit the wheel into the truing stand properly. The first step is usually taking the wheel off your bike.
However, there are ways to do this with the wheel still on the bike as well. Make sure the wheel is securely clamped into the truing stand regardless of whether it is attached to the bike or not.
Once you have it set up, you will have to adjust the wheel with the calipers of the truing stand so that it can touch the rim at one or two points when you rotate the wheel. Use the caliper adjusting knob for re-adjustment.
Now, spin the wheel to check if it is spinning properly and touches the calipers or not. If everything looks good, then you are done with the second step and ready to move to step three.
Step 3: Carefully Check the Tension on All the Spokes and Adjust Them
Now, this is the most important part of the wheel truing process because here, you will identify and tighten/loosen those spokes that need alignment adjustment. Here’s how you will know where to mark:
- Spin the wheel and see where the truing caliper touches the rim. Make sure you check all the spokes on the left side spokes and right sides.
- Mark the area with the chalk.
If you see the caliper touching at a point, it means that this part of the wheel’s spokes needs to get loose, and the opposite part of the wheel spokes needs to get tightened.
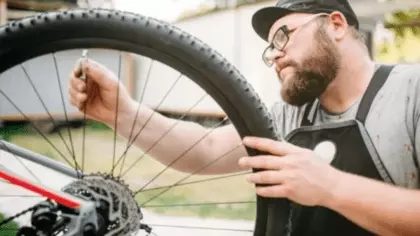
- Once you find where the adjustment needs to be, use your spoke wrench to tighten or loosen the spokes.
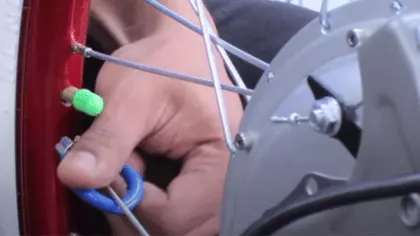
- To do that, set the spoke wrench to the spoke nipple and turn clockwise to tighten. On the other side, turn the spoke wrench anti-clockwise to loosen the spoke.
However, do not make a lot of changes at the same time. Make sure you spin the wheel after a change, then check and adjust the tension as needed.
Step 4: Check the Wheel Again and Finish the Process
Once you tighten or loosen the problem spokes, continue the checking process until you find out other areas where spoke tension needs to be adjusted or any broken spoke.
When you have adjusted all the possible spoke tension, finish the process by re-setting the wheel to the cycle. This is how to tighten your bike spokes by using a wheel truing stand.
What Should You Know Before You Tighten Bike Spokes
Here are some important facts that you should understand whenever you tighten your bike spokes:
It Is Good to Tighten Both Front and Back Rim Spokes
When it comes to tightening your bike’s spokes, make sure you check the spoke tension in both of your wheels. Because- when one wheel gets curved, there is a huge chance that the other wheel also gets bend.
Once you have checked the spoke tension of the front and rear wheels, identify if there are any loose spokes or not. If you find any loose spokes, then tighten them according to the instructions above.
Similarly, if you find any over-tightened spokes, make sure you loosen them to balance the tension. It is not mandatory to check both wheels’ spoke tension, but doing this will maintain a good balance between the two wheels.
Don’t Tighten Too Much or Leave it too Loose
When you are tightening your bike’s spokes, make sure you have measured the spoke tension properly with a spoke tension tool or that you have checked it manually.
It is important to tighten or loosen any spoke only after knowing its tension. If you don’t know when to loosen and when to tighten, your wheels will not true accurately, and they will remain curved. On top of that, understanding the spoke tension will not let you tighten or loosen any spoke too much, which will increase the longevity of the wheel and provide you with a smooth riding experience.
So, whenever you try to true your wheels, make sure you have measured the spoke tension properly. Only then should you true a wheel.
How Do You True a Bike Wheel Without a Truing Stand?
We don’t recommend trying a wheel without a truing stand because if your wheel needs a major alignment change, you will not get the best result without a truing stand.
However, here are some steps you can follow to true a wheel if your wheel does not require minor adjustments and you don’t have a truing stand:
Step 1: First, Identify the Spokes That Need Adjustments.
If you don’t have a truing stand, flip your bike upside down and follow these 3 methods below to identify all the loose spokes.
Method 1: The Screwdriver Method
To identify the problematic spokes with a screwdriver-
- Open the brake lever.
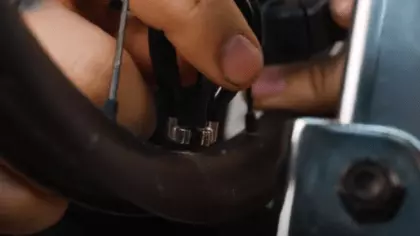
- Take a flathead screwdriver and hold it at the end of the brake pad.
- Spin the wheel and move the screwdriver close enough to the rim so that it hits the rim on one or two points.
- Once you see where the screwdriver hits, mark that area with chalk. These are the points where you need to adjust the Spokes.
The pro of this method is that you can hear where it hits. The con is that it can scratch the rim, which you would not want on carbon fiber wheels or brand-new wheels.
Method 2: Use a Zip Tie
Another way to identify the problematic spokes is to use a zip tie. To do that:
- Catch a zip tie to the seat stay.
- Pull it through so it can rest on the frame.
- Snip off the tie just above the rim.
- Spin the wheel and adjust it with that zip tie so it just barely touches the rim at maybe one or two points.
- Mark those points where the tie touches the rim.
The main perk of this method is that it won’t damage the rim surface. The disadvantage of the method is it produces very little sound, and you must look very closely to find the points that hit the rim.
Method 3: The Brake Lever Technique
Another way you can identify the spokes that require adjustments is to open the brake lever. To do that-
- Open your brake lever.
- Spin the wheel.
- Then slowly close the lever till you reach a point where the brake pad just hits the rim.
- Identify those points where the brake pad touches the rim. These are the points where spokes need adjustments.
The advantage of the method is you can identify the problematic spokes by using your bike’s components. The disadvantage is that your brake pad can get damaged after continuing the process for a while.
Step 2: The Spoke Tension Adjustment Stage
Once you have learned how to identify the problematic spokes in a wheel without using a truing stand, you can easily adjust their tension by reading the previous section of this article, where we talked about how to tighten spokes properly.
Also Read: How to tighten a bike chain
Frequently Asked Questions
1. Should I Tighten My Spokes?
Probably, yes! Tightening your bike spokes helps maintain a balance between the hub and the rim. When you ride your bicycle, its wheels naturally jerk on the road, and your spokes get looser after a period, which causes the wheels to curve.
A curved wheel can badly affect the performance of the bike, and it is not safe at all! So, if you want a smooth biking experience without a damaged wheel, you should tighten your spokes when it is required.
2. How Often Should Spoke Tension Be Checked?
Checking your spoke tension is a great way to get the maximum performance out of your bike. The amount of checking depends on how often you ride your bike and where you ride.
If you ride your bike daily on a regular track, then it is good to check your spoke tension once or twice a month. But if you ride your bike on a mountain trail or a rocky track, you should check your spoke tension every week, or even after a single ride.
3. What Is a Spoke Tension Meter, and How does it Work?
A spoke tension meter is a device that helps you to measure the tension of the spoke and tighten them based on the tension they need. Basically, it measures the deflection of the spoke and tells you how much tension it currently has via a graph.
Of course, the tension will be a value set by the Rim manufacturer as an ideal, and you have to attain that value as much as you can to tighten or loosen your spoke as it’s recommended on the calibration chart.
Final Words
Indeed, it is highly important to check the spoke tension and tighten spokes after a specific period. Well, in this discussion, we tried to tell you how to tighten bike spokes through a few simple steps.
We hope that the steps detailed here will be easy to understand and follow. By the end, you will know how to tighten your bike’s spokes. Don’t forget to read the section where we talked about how you can true your wheels without using a truing stand! Happy trails!

Steve Beck is a passionate cyclist and experienced writer covering the cycling industry for over a decade. He has a wealth of knowledge and expertise in all bike-related things, from the latest products and technologies to the best routes and trails. His articles are well-researched, informative, and engaging, and he has a talent for explaining complex cycling concepts in a way that is easy to understand. Steve can be found on the road when he’s not writing about bikes, putting his knowledge and skills to the test.

