How to Adjust Bike Brake Rubs on One Side: in 7 Steps
Have you ever had one of those dreams where you were being chased by a monster, riding your bike with all your heart and soul to get away from it, but no matter how hard you pedal, it’s just not speeding up? I feel you, Dude.
Let me guess: that nightmare just came true, right? Bike brake rubs on one side could be a horrible experience. It slows down the speed and makes it harder for you to pedal.
It’s a must to have your bicycle braking system working fine while you are on the road. Without a fine brake, you are just gambling with your life out there.
So, how do you fix brake rubbing? Come, let me show you.
Getting to Know Bike Brakes
The brakes on your bike protect you like a bulletproof jacket when you are riding out there on the road. Getting to know the bike brake is as essential as knowing how to ride the bike.
The brake system functions by putting friction on the ground. On a mechanical brake, you will see cables come assisting when you press the brake. Hydraulic bikes have fluid to activate the brake pads.
Now you’re probably saying, “Dude! Is this Latin or Sanskrit? Those words are flying over my head.” Oops! My bad. As we continue, it will start to get clear and clearer, alright? Let’s keep going. I promise this will all make sense!
Types of Bike Brakes
Different bike brakes work and respond in different ways, so to understand them, you have to know their types first. There are 5 basic types of bike brakes. Let’s get started with the first and most common one:
Rim Brakes
Rim brakes have been here for a long, long time. It’s the most effective and popular bike brake system ever. You can get a decent braking ability without having to do much maintenance. This brake is controlled using hand levers connected to the main brake.
When you pull the brake lever, the cable is going to move the two pads and brake on both sides and press against the rim to slow down the speed. There are 2-types of rim brakes out there:
Caliper Brakes
This brake is connected directly to the frame or fork by one bolt. On both sides of the wheel rim, two arms of the braking system are placed. Since they provide decent stopping power, this type of brake is usually set up on road bikes.
One downside of this braking system is it cannot function effectively with thick tires. This setup is unable to wrap around those thick-shaped tires.
It also has many types; however, they all follow the same method. On a few caliper brakes, the cable is placed on one side when some of it is placed directly in the middle.
Cantilever Brakes
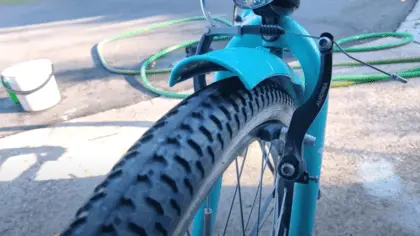
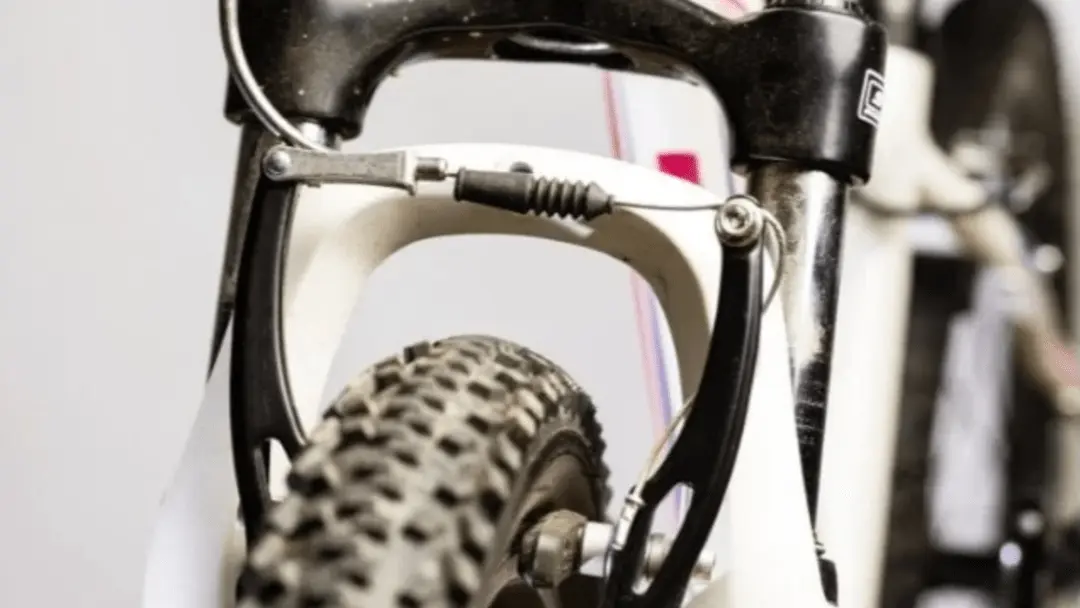
On cantilever brakes, you will find the two arms entirely separated, and each of them is attached to each side of the brake’s fork. The fork and frame come with brazed-on fittings in order to hold on to the bolts.
This type of brake is very common on mountain bikes as they require great stopping power when moving downhill. When you have these brakes on, you have nothing to worry about, even on wet surfaces.
V-brakes are a good example of a cantilever brake. Some people also call them direct-pulling brakes and linear-pull brakes. The only difference is in their cable placement.
Disc Brake
In recent years, the disc brake has become a pretty common practice in bikes. Their strongest selling point is their mighty stopping power, and they can function even when the wheel of the bike is warped.
This type of braking system works by relying on a disc rotor attached to the hub. Special brake pads in the braking system squeeze the rotor, forcing the wheel to slow down.
There are usually 2-types of disc brakes. One is a cable disc brake, and the other is a hydraulic disc brake:
Cable Disc Brakes
The name explains the function. They work by a cable attached to the bike’s brake levers on the handlebars. This type of braking system is a lot easier to maintain and also comes with a much lower price tag than hydraulic ones.
The stopping power it provides is good enough but not as strong as hydraulic brakes.
Hydraulic Disc Brake
The hydraulic brake also needs a cable to work. It has a cable connecting the brake lever to the original brake. But it does not have cable in the housing; instead, there’s mineral oil.
When you pull the levers, the oil provides pressure to the brake pads, and the system contracts. You get more stopping power from hydraulic brakes than cable brakes.
Drum Brakes
Drum braking systems are found in the rear hub. They won’t work well in wet conditions and require very little maintenance. However, they are not as light as disc brakes and rim brakes, and their full braking power comes into action after a bit of use.
The drum braking system also needs a cable to function. The cable is attached to a lever on the handlebar.
You will often see them on commuter bikes. The gears are placed inside the hub and have around 8 gears.
Coaster Brakes
Coaster braking systems are one of the oldest braking systems on bikes. You will usually see them on a kid’s bike. They are not compatible with bikes that have rear gears.
Their metal attachments are connected to the chainstay. The mechanism of this brake is quite minimal: no hand levers, no cables, and it requires very little maintenance.
But the sad part is they are only available for the rear wheel. That’s risky: when you stop suddenly, the bike might start skidding. You can pedal to the coast.
However, you won’t be able to move the bike’s pedal backward; that would trigger the braking mechanism.
Fixed Gear Brake
Fixed gear brakes do not have the option to coast. This means when you move forward, so do the pedals. This type of brake is usually found in track cycling, and they are quite popular among couriers for its reliability and ease of care.
By the way, you will still get regular cable brakes with a fixed-gear brake on the front wheel. Some of the single brakes come with a flip-flop wheel. Keep in mind that, with this type of brake, the rear cog comes fixed on one side.
If you flip the wheel, the opposite side cog will remain single, but it will be able to coast. That means you won’t have the option to stop the bike using the pedals, and you are going to need the regular rim brakes.
How to Adjust Bike Brake Rubs on One Side?
When your bicycle has a brake rubbing issue, the first thing you will encounter is slower speed, no matter how fast you pedal.
But you know what they say: “every problem comes with a solution.” Well, this is no exception! Simply adjusting the brake pads should take care of the problem.
You will need a few tools to fix the issue, including a good wrench and the basic knowledge of the bike braking system, which you already have. Let’s start the main mission now.
Step-by-Step Guide to Fix Caliper Brake Rubbing Issue
Fixing the rubbing issue on your bike is not rocket science. You won’t have to change your entire brake to get rid of the problem.
Sometimes the problem could be related to a small screw, an off-center brake pad, damaged springs, worn-out rims, or a bad nut. Let’s have a look at the solutions:
Step 1: Check Your Brake Pads
The first thing you want to check is the brake pads. On the tip of each of the bike calipers, you will find rubber pads. If you find that the surface is smooth instead of grooved, then you must replace them with new ones.
Step 2: Check Out the Brake Pads Grip
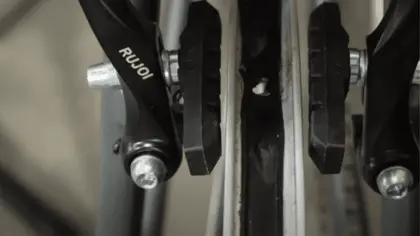
Get a stand and prop the bike on it. After that, check the front wheel to find any front brake rubbing. If you notice any pads rubbing against the rim even when you aren’t pressing the brake, that means the pads are not positioned correctly in the center.
While you turn the front wheel, keep applying the braking pads. Find out where the pads touch the rim. This should grip the center of your bicycle rim. Apply the same method to the rear braking system. This should fix the issue.
Step 3: Center the Bikes Brake Pads
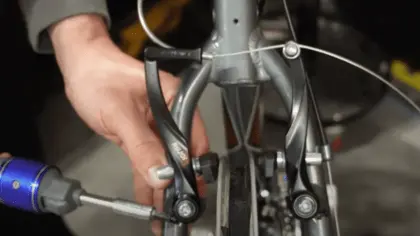
If your bike brake pads rub on both sides, then you will have to loosen the bolt that secures the bike’s brake pads to the caliper. This can be done by simply turning the wrench to the left position.
Until the braking pads are centered to the rim, keep adjusting them. You might want to check above and below each brake pad to ensure they are the same.
Once they are centered, keep the braking pads in a fixed position while tightening the bolt in a clockwise direction. Now, to double-check the brake, just squeeze your braking lever when turning the rear or front wheel.
The brake pad should clamp down on the middle of the bike’s rim simultaneously. That should fix the problem of rear brake or front brake squeezing.
Step 4: Inspecting Your Brake Cables
If adjusting the braking pads didn’t fix the rubbing issue, the next thing you need to check is your brake cables. Check if the brake wires are tight enough or not. Trust me. The process is a no-brainer.
First of all, squeeze the bike’s braking lever and inspect how long it reaches relative to the handlebar.
If there are less than 1.5 inches of space in between the top surface of the bike handle grip and the brake lever’s bottom edge, then the problem is probably not related to the cable tension of the bike.
If you’ve done all this, there’s no need to tighten it further. Tightening the brake wires might worsen the issue. If you see the braking lever is extremely close to the handle grip, then you might have to tighten it a bit.
Step 5: Adjusting the Brake Cables
You will see a barrel adjuster near the contact between the lever and cable on the bicycle brake lever assembly. Move the barrel adjuster clockwise to tighten the braking cable tension. If it feels too tight, then just do the opposite.
Step 6: Check Out the Brake Calipers
The braking system caliper is supposed to move whenever you squeeze the brake. If you notice that only one caliper is moving toward the rim, then you will have to reposition the calipers.
The brake caliper has a device like a spring that lets the two opposing ends head toward the rim. You need to check if it’s in the right position. Riding your bike on tough terrain can damage the spring tension.
Step 7: Adjusting the Calipers
First, you need to loosen the caliper bolt using a wrench or any tools by moving it in an anti-clockwise direction 2-3 times. You don’t have to remove or replace the entire bolt.
Now, get the brake wires out and keep them in place using your bare hands. This process should tighten the caliper as well as the bike’s brake pads against the rim.
Final Verdict
If you have been riding a bicycle for quite a while, you know how annoying brake rubs can get. It’s not an issue that should be ignored, as it can lead to serious injuries, or worse!
As a conscious biker, you should perform a regular inspection on your bike. Or take it to the bike shop and let an expert perform the inspection. You know what they say: “better safe than sorry.”
If you have read this far, we hope you won’t have to deal with the bike brake rubs on one side issue. Stay safe!

Steve Beck is a passionate cyclist and experienced writer covering the cycling industry for over a decade. He has a wealth of knowledge and expertise in all bike-related things, from the latest products and technologies to the best routes and trails. His articles are well-researched, informative, and engaging, and he has a talent for explaining complex cycling concepts in a way that is easy to understand. Steve can be found on the road when he’s not writing about bikes, putting his knowledge and skills to the test.

