What Are Clipless Pedals? A Beginner’s Guide
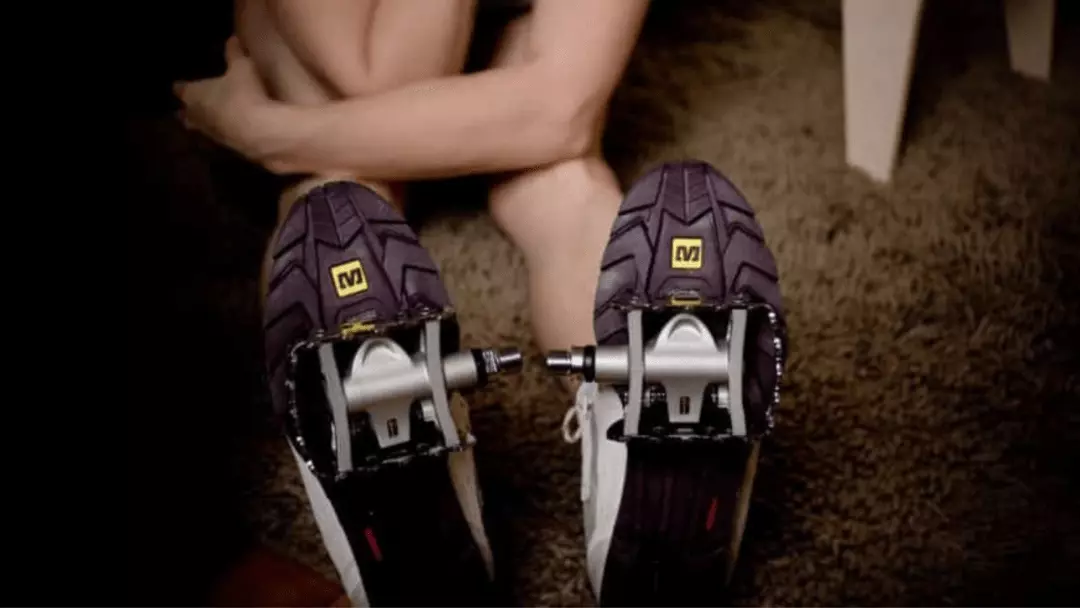
You have heard about them, you may have seen them on other bikes, and you wonder what are clipless pedals?
You are at the right place! Come in and learn all you need to know about them, even if you are a beginner!
A Beginner’s Guide to Clipless Pedals, and How To Use Them
Switching to clipless pedals can be a source of anxiety for many cyclists. Your shoes are held tightly in place by a mechanism, and locking feet to pedals puts a scary image in the back of a rider’s mind. They don’t want to lose control on the bike.
However if there’s one upgrade on your bike that will make you a faster, more efficient, and more controlled cyclist, it’s the addition of clipless (or “clip-in”) pedals to help enhance your riding. They’ll even have similar effects during a spin class as well.
The fact is, once you experience the positive effects of riding with clipless pedals for beginners, you will not go back to cycling without them.
Having recently tried old fashion clips and straps on a hire bike whilst on holiday in Sardinia, I realized just how much a set of clipless pedals can benefit anyone’s cycling. The difference in pedaling efficiency was huge; the old-fashioned clips just had far less control.
What are Clipless Pedals and how do they Work?
This piece is written for any cyclist looking into clipless pedals for the first time. I’ll talk about how clipless pedals work, how to use them, and give you some tips to get comfortable with clip-in cycling in general.
Key Advantages of Using Clipless Pedals
- The foot stays in contact with the pedal throughout the whole pedal stroke
- Consistent position reduces injury risk when combined with float to allow the foot to rotate
- Easier to disengage the foot from the pedal than traditional clips and straps, making it safer
- Enhanced power output on the upward stage of the pedal stroke compared to traditional flat pedals
- More efficient use of power throughout the pedal stroke
- Enhanced control while cornering and manoeuvring your bike
- Cycling specific shoes are less flexible than a pair of tennis shoes or trainers and this improves pedalling efficiency
The Three Elements of the Pedal System
- The shoes
- The cleat (the piece that attaches to your pedal)
- The pedal (into which your cleat will fix itself with your assistance)
The majority of cycling shoes are compatible with either Look (3-hole mounting) or Shimano SPD (2-hole mounting) pedals. It’s always best to check compatibility before you buy.
A Brief History of Clipless Pedals
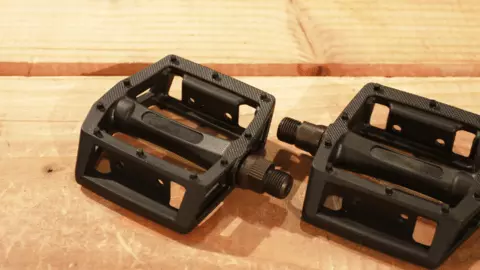
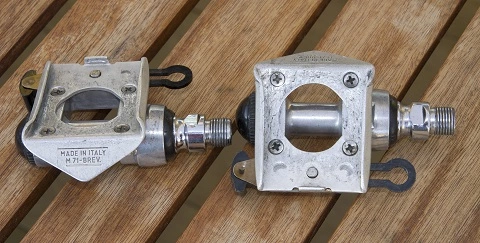
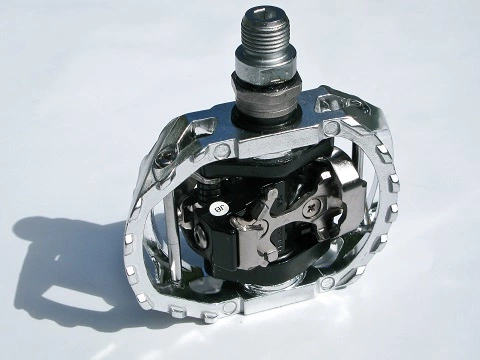
In the beginning, there were just flat pedals, then the racers developed clips and straps to hold their feet into place with the pedal whilst riding for additional control. See the clips and straps pictured to the right for reference.
The inspiration for clipless cycling pedals came from ski bindings. Some of the first clipless pedal systems were pioneered by Cinelli of Italy in the 1970s.
The Evolution of Clipless Pedal Systems
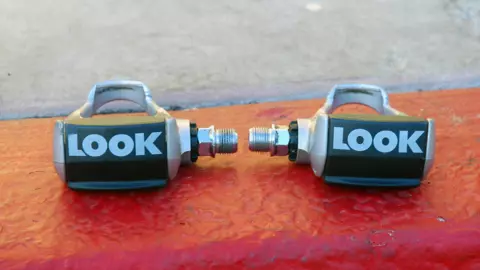
It took until the 1980s for clipless pedal systems to become acceptable for racers when the French company Looks developed the first commercially successful clipless pedal system. Look’s pedals feature a three-bolt design which has become standard with most road cycling shoes.
The standard two-bolt system found on the bottom of many mountain bikes and touring-style shoes is from Shimano’s SPD (Shimano Pedalling Dynamics) pedal system which was developed in the early 1990s. It features a significantly smaller cleat to fit into a recessed sole, allowing for easier walking when not on your bike.
How To Use Clipless Pedals
How Do I Clip In? And Just as Importantly: How Do I Clip Out?
There are a couple of common worries for beginners using clipless pedals for the first time. Firstly, they worry that they will have difficulty clipping into the pedal system, and secondly, that they will struggle to get their feet out of the pedals where required.
Honestly, there will likely be a learning curve, and hiccups are to be expected. The inability to clip out of clipless pedals for beginners often happens where you would least like it to occur, such as in traffic or rolling up to a set of lights alongside a busy pub beer garden on a sweltering hot day. (That’s my own personal experience!)
Practice makes perfect, and clipless pedals work brilliantly once your muscle memory takes over.
Clipping In is Pretty Simple
To clip yourself into the pedal you simply slide the front of the cleat under the front catch of the pedal and press down hard with your heel. As the cleat engages with the pedal you will hear and feel a reassuring click (in most cases) which lets you know that your foot is now clipped into the pedal.
And don’t worry if you do fall off as you get used to using them. It is a very rare occurrence, but it’s happened to the best of us.
Clipping Out Is Almost Instinctive
To release your foot from the pedal system you need to twist your heel out to the side until the cleat disengages from the pedal. In times of panic, this process is almost instinctive and will allow you to easily release from your bike as required.
TIP: Practice Clipping In Against a Wall
One of the best initial ways to practice is by leaning with your bike against a wall for support whilst practicing the simple process of clipping in and out. If you have SPD cleats, practicing on a compatible spin bike at the gym is also a good way to get accustomed to the process.
More Tips For Riding With Clipless Pedals
- Always clip in first with one foot as your ‘lead’. The key to learning a new skill is developing a habit. Initially aim to have the pedal for your lead foot around the 12-1 o’clock position on the clock face. This will allow your lead foot to push you off and allow you to gain some forward momentum prior to clipping in your second foot.
- When stopping at sets of lights or a café, always unclip with the same foot. It’s all about your routine again and if you unclip with the same foot every time, it gives you more confidence as you put it to the floor. Ideally, this should be the opposite foot to the one you lead your initial clipping in with, as it will allow you to quickly gain momentum again when the lights turn.
- You don’t need the most expensive shoes and pedals to learn with. Fancy road cycling shoes will have a pretty stiff carbon sole which will make them a challenge for walking. Furthermore, the engagement mechanism on many high-end pedals will lock your feet in place which may cause difficulty unclipping if you’re still learning how to use clipless pedals.
You don’t have to spend a fortune on your first set of pedals and shoes. Walking comfortably is often the key, and a set of affordable touring or mountain bike shoes will really help you gain confidence.
I still have the old Northwave mountain bike shoes I started riding with today and they’re still great for me to keep in the back of the car for spin classes at the gym, despite being over ten years old.
- Start with your pedal at its lowest tension. Many pedals have a tension screw on them that you will be able to see prominently. Initially have this at the lowest level of tension as this will allow you to easily clip in and out of your pedals. As you get more comfortable riding you can gradually add more tension over time.
- Start by having cleats with a degree of “float” built into them. Unlike ski bindings where your foot is locked in position, most cycling cleats have a degree of movement within them. Make sure that the cleats on your first pedals allow you some ankle movement. Float guards against joint problems in the long term. If you buy a set of Look pedals, stick to their intermediate grey-colored cleats or red cleats initially and steer clear of their black cleats.
I’ve reviewed several clipless pedals and some compatible shoes. Read my recommendations here. Thanks for reading!

Steve Beck is a passionate cyclist and experienced writer covering the cycling industry for over a decade. He has a wealth of knowledge and expertise in all bike-related things, from the latest products and technologies to the best routes and trails. His articles are well-researched, informative, and engaging, and he has a talent for explaining complex cycling concepts in a way that is easy to understand. Steve can be found on the road when he’s not writing about bikes, putting his knowledge and skills to the test.

Thanks Liam. Having just started cycling after a twenty year absence, such an “idiot’s guide” is great.