How to Inflate Tubeless Bike Tire with Hand Pump? 8 Easy Steps
When it comes to mountain bikes, people usually prefer tubeless tires since they are more puncture resistant, lightweight, durable, and provide excellent support against off-road rocky surfaces.
But, inflating a tubeless bike tire is not as simple as inflating bike tires with tubes. Owning a hand pump is not the only solution here; you need to know the correct technique to complete the task before you are able to ride on it.
So, how to inflate tubeless bike tire with hand pump?
Well, this is what we are going to discuss in detail in this guide so that you don’t have to worry about inflating your tubeless tires from now on.
How to Inflate Tubeless Bike Tire with Hand Pump?
Tubeless tires require the proper amount of air for optimum functioning. Finding the right PSI is the trick here, which requires expertise.
Select the Suitable Bike Pump for Your Tire Valve
The tires will either have a Presta valve or a Schrader valve based on the kind of bike you own. If you don’t know which one is for which, refer to the last section of the guide.
Once you understand the valve type, ensure your chosen bike pump works with the valve type. Typically, bike pumps are compatible with a Schrader valve, but you might require an extra adapter when working on a bike tire that is equipped with a Presta valve.
In this case, you have the luxury to use either a hand pump or a floor pump for tubeless bike tires.
Find out the Required Pressure for Your Tubeless Tire
Don’t underinflate or overinflate your tubeless bike tires. Have a look at your bike tire’s sidewall to know the recommended maximum and minimum tire pressure. It is usually measured in a unit called PSI.
According to experts, road bikes need a higher PSI in comparison to hybrid tires or mountain bike tires. The recommended volume is 40 to 70 for hybrid tires or cruiser bikes, whereas road bikes should be between 80 to 130 PSI, and mountain bikes should have 25 to 35 PSI.
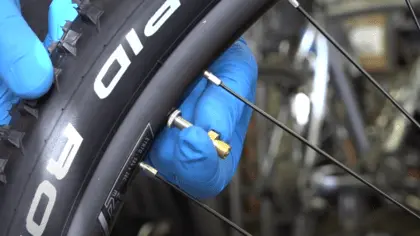
Remove the Valve Cap
For both Schrader valves and Presta valves, the plastic cap must be removed. Make sure to keep the cap in a safe place, so you don’t lose it. The cap has the important task of keeping debris and dirt out of the opening point of the valve.
If the bike’s tire valve is a Presta one, unscrew the locknut and remove the cap. Now, rotate the Presta valve a few times to open up the tubeless valve prior to connecting the pump. This extra step will not be needed if your bike has a Schrader valve.
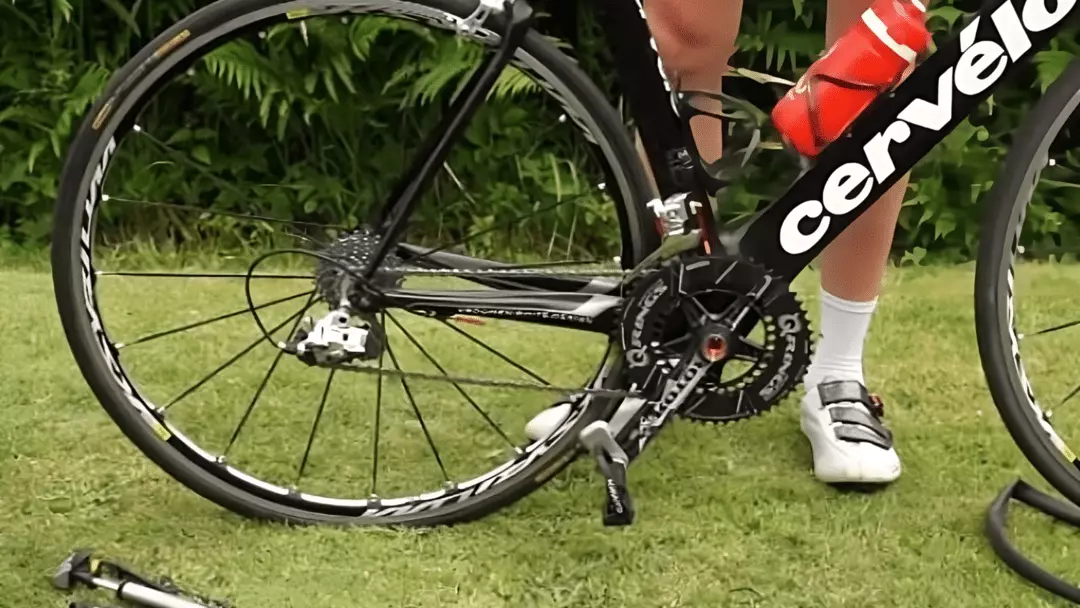
Position the Floor Pump on the Valve
In most cases, both the hand and floor variants come with 2 nozzles to accommodate both Schrader and Presta valves. Select the correct nozzle and position the pump over the valve, slowly shoving it onto the valve.
Draw up the Lever of the Pump
Now, you are almost ready to start pumping. Most bike pumps work with a certain lever, which should have a 90-degree angle rotation for this purpose. Instructions may differ based on the head of the pump, so refer to your particular pump for directions.
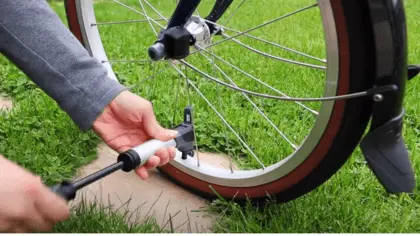
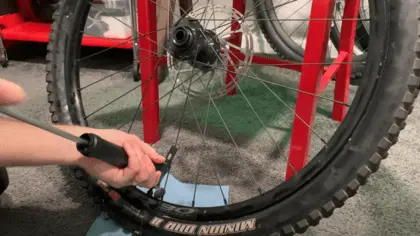
Inflate Your Tubeless Tire
Make sure the hand pump is tightly held to the bike tire valve. You can start pumping at this step. Hold down the nozzle against the valve stem with one hand and pump using the other hand.
A pressure gauge may or may not be present on your hand pump, but we highly suggest you get the one that comes with a pressure gauge.
Eyeballing the tire will not provide the best results. Inflate the tire until the expected air pressure is reached.
Diverge the Pump out of the Valve
Push down the lever if you have to pull it up. Now, remove the nozzle from the valve. You might hear the sound of a little amount of air leaving as the pump is taken out. This is totally normal and will not create a huge difference in tire pressure.
Remove a Little Air If It’s Overinflated
For Presta valves, the locknut should be opened while you squeeze the valve, and make sure you hold it until some air is released. In contrast, for the Schrader valve, press down the valve using your fingernail.
Shut the Valve Off
In terms of closing a Schrader valve, the dust cap should be placed on the tire valve once again. Bend the locknut shut before putting the dust cap right back on for the other kind.
If you have inflated the tire to the standards of the accurate PSI, the tubeless tire will feel warm. Then, you are all set to get back on track!
How do you determine the Valve Type?
Presta valves usually come with a locknut on the top of the stem that lets you close and opens the valve. Based on the hand pump you have chosen, you may need an adapter with the Presta valve. Generally, mountain bikes and road bikes are equipped with the Presta type.
On average, these valves are narrower and carry a bunch of different valve stem lengths. In comparison, Schrader valves are generally added on BMX bikes.
These valves are the same as the ones you would find on the tires of a car. In most cases, bike pumps are compatible with Schrader valves, with no additional adapter.
Presta valves are certainly more delicate compared to Schrader valves. Knocking the threaded internal valve body and breaking or bending it is easy to do, so you have to be a bit more careful when a Presta valve is concerned. However, with the proper tools, replacing a valve core is easy, too.
A lockring comes in the Presta valve, which secures the valve body flush against the rim. It can be a bit easier to inflate them due to this feature. It is not mandatory to close the dust cap, but it assists in keeping the valve clean.
Valves are directly attached to the rim for tubeless considerations instead of being a part of the inner tube. Most tubeless tires have Presta valves, but Schradertypes do exist.
The Trick to Inflating Tubeless Tires
Good news for all the lazy bike owners out there! Maintaining appropriate tire pressure is quite simple. Just make sure to examine your bike tires at least once per month, so there is no surprise element waiting for you on your next ride. When we speak of inspecting tubeless tires, we don’t mean only visual inspections.
We think buying tire pressure gauges is well worth it. These inexpensive tools tell you what’s wrong with your tires. A basic gauge sells for under$10. These handy compact devices calculate a tire’s PSI. You must compare the present PSI of the tubeless tire to its suggested PSI.
This procedure is further simplified if you use the tires originally included with the bike. In this case, the manufacturer-recommended PSI information should be mentioned in the owner’s manual. With replacement bike tires, however, the relevant information can be found on the sidewall (generally).
When using a gauge to check the tires, you will achieve the most precise results in colder temperatures. The pressure reading could be misleadingly high if you have just finished a ride or it’s hot outside. If you don’t want to buy the necessary bike pump, you can normally find free air kiosks at a local gas station.
How Does a Pump Work?
A tire pump delivers oxygen to the tires. It raises air pressure and compressed air force in the wheel. Pumps are simply pistons to be used manually by the rider. A check valve is what permits airflow in a particular direction and closes the piston chamber when there is a draft.
The pressure rises until it is greater than that in the tires. During this stage, an additional one-way valve allows the air into the tire from the air compressor pump chamber.
Types of Bicycle Tire Pumps
Not all hand pumps offer the same number of features. Primarily, two types of bike tire pumps are there: hand pump and floor pump.
Floor pumps can be stored in your garage, perfect for use whenever required – whether you are doing some weekly maintenance or need some more air in the tires before a ride.
In conclusion, a floor pump has greater capability and can easily inflate bike tires 160 PSI at max; you may not even need that much. You would require a comparatively tinier nozzle hole, when it comes to the Presta valve.
A hand pump is a compact, portable pump that you can store anywhere you want or take on rides. These are very useful if you have to inflate your tubeless tires with enough pressure while riding.
Why You Should Keep Tubeless Tires Properly Inflated?
Keeping bike tires properly inflated offers a lot of benefits. It can distribute wear and tear along the surface of the tire properly, prolonging its life. With correctly inflated bikes tires, your bike will offer better handling, dependable traction and a more comfortable ride.
Reduction in Tire Wear
Low air pressure results in uneven wear, and it’s the biggest reason behind tire failures. According to the Tire Maintenance Council, tires operating at 10% underinflated have a 16% tread life cut-off.
Alongside regular balancing, alignment, rotation and pressure maintenance, you can significantly reduce the chances of getting erratic tire wear patterns.
Increased Safety
Appropriately pumped tires offer improved handling. When the tire pressure is too high or too light, the bike cannot maintain proper traction on the road, which makes it more dangerous to ride.
Overall, reduced tire pressure has a dramatic effect on handling and steering. Also, correctly inflated tires extend the casing life of the tire, causing fewer blowouts and overheating.
Decreased Accident Risk
Underinflated tires do not have enough traction. This means it takes longer to bring the bike to a full halt, which can be the determining factor between an expensive accident and a near-miss mishap.
Low-pressure tires are more prone to skidding on wet roads. Moreover, a blowout increases when you ride with underinflated tires.
Frequently Asked Questions
1. How Often Should I Inspect the Pressure in My Bike Tire?
This largely depends on how often you use your bike. However, regardless of how frequently you ride, we recommend you check your tire pressure daily. Some riders will even check tire pressure before each ride, while others do it weekly.
2. Is Deflating a Bike Tire Possible After Overinflating It?
Yes! If you mistakenly put too much air into your tire, you could easily remove a bit of it until the accurate PSI is reached.
In terms of Schrader valves, take one fingernail and press down on the tire valve until a little air escapes. The locknut should be opened after that for the Presta variant, and you need to hold down the tire valve to the point at which the excess air is bled out.
3. How Long Do Tubeless Tires Last?
The service life of a tire’s tubes depends on several factors, including usage frequency. Once they are properly sealed, tubeless tires can heal themselves – technically. The tubeless sealant inside will need replacement. Different sealants have different working principles.
Sealing materials are usually either latex-based or fiber-based. Latex sealing products may last over 1,000 miles, while fiber-based ones can last a while. If your bike tire develops a cut or gets brittle, it is best to have it replaced to protect it from damage.
4. How Do I Determine Tire Pressure?
You can find the tire pressure for your particular bike tire on the tires’ sidewalls. The pressure level’s range can vary from the minimum to the maximum of those on the sidewalls.
5. What is the Right Tire Pressure for My Bike?
For tubeless tires, the acceptable tire pressure is about 70 PSI for the front tires and 83 PSI for the back ones. The suggested pressure levels are mentioned on a particular area of the bike tire.
You have to consider a few variables, such as the weight of the bike plus the number of passengers and the condition of the roads.
Conclusion
So, this covered how to inflate tubeless bike tire with hand pump. Hopefully, you will be able to navigate through this process without errors and properly inflate the tires through pumping.
Keeping your mountain bike or cruiser bike tire pressure at recommended levels is needed for optimum performance. The trick to inflating tubeless tires is to be careful not to overinflate or underinflate. Hand or floor pumps are very convenient for riders who like staying on the road. Have one with you at all times to avoid unwanted incidents.

Steve Beck is a passionate cyclist and experienced writer covering the cycling industry for over a decade. He has a wealth of knowledge and expertise in all bike-related things, from the latest products and technologies to the best routes and trails. His articles are well-researched, informative, and engaging, and he has a talent for explaining complex cycling concepts in a way that is easy to understand. Steve can be found on the road when he’s not writing about bikes, putting his knowledge and skills to the test.