Why does My Bike Seat Keep Tilting? [4 Possible Reasons]
For a good, proper bike ride, everything must be perfect. You know, no conflicts in your schedule, light traffic, and a solid, well-maintained, perfectly proportioned bicycle. But sadly, any number of things can go wrong to interfere with your happy day. One potentially catastrophic example is your bike seat falling off!
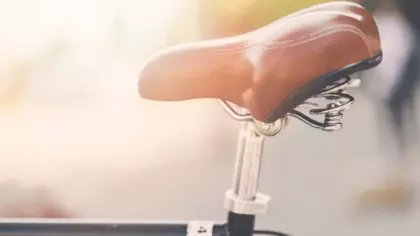
While this worst-case scenario is rarely realized, it is a common problem that most bikers will face, at some point, that their seat will unexpectedly tilt downward while they are riding.
Some seats are even loose enough to move from side to side or to slide from front to back. Whatever the specifics, a loose seat will definitely interfere with a happy cyclist’s enjoyment of their ride.
If you have faced this problem before and are wondering, “Why does my bike seat keep tilting?” then you have come to the right place for answers. Keep reading to learn how to identify the problems and fix them all.
Why is a Tilting Bike Seat a Serious Problem?
Bike riding – with all the balancing and everything – is already difficult enough. Let’s avoid the seemingly tiny annoyance of a tilting bike seat if we can. After all, it could have a much more devastating effect than simply disturbing your riding enjoyment.
When we looked into this seat tilting issue, we discovered that it might put you in quite an uncomfortable position, especially for riders whose bikes have flat seat posts.
If you are using an older model from earlier than the past 10-12 years, you must have noticed that the seat posts are more square and flat. They’re definitely less ergonomic than newer models and are more likely to have seat posts that are not designed for our body’s pelvic shape.
We can personally attest to how bad the back hurts after riding for hours on a flat seat post. Imagine how much worse it is when that awkward, uncomfortable seat also tilts on you!
This is why tilting is a major problem for bikers who have flat seat posts. And no rider will like a tilting bike seat or if their bike seat keeps coming loose, because that will sap an otherwise enjoyable experience, no matter how form-fitting and comfortable your seat is.
Our goal, then, needs to be to get that thing fixed, and tightened before we even go out!
Read More: Why does my bike seat hurt
Why Does My Bike Seat Keep Tilting: 4 Common Reasons
Before you can fix a problem like this, you will need to identify what’s causing it to happen, and that will entail checking several things about your bike’s various mechanisms. In search of the answer to why your bike seat keeps tilting, we have highlighted for you some common reasons.
1. The Seat Rails are Not a Tight Fit
If your bike seat tilts up and down, then you can skip this paragraph, as it is only for those who are struggling with seat posts that tilt forward and backward.
This happens because your seat rails are not well-positioned. Why, though? Maybe you have the wrong rail size (common sizes are 7mm or 8mm); the size you have doesn’t fit firmly to your seat clamp. If it’s a bit lose, you can expect a little aggravation when you are trying to enjoy a bike ride.
So, what can you do to ensure that the saddle-positioned rail and clamp post grip each other well? If you want to save time, simply visit your local bike store and let them find the exact size you need.
If the issue continues to persist, then it’s probably time to do some clean-up. Sometimes, dust particles can build up in the tiny gap between the seat rail and the seat clamp. So, make sure you clean that area every 3-4 now and then.
2. Your Seat Post May Be Loose
Do you know what glues your bike’s seat to the seat post? It’s a clamp. If it happens to be loose, then your seat post will tilt when you are riding it. Does that mean simply tightening the clamp will fix the problem?
Well, it might, actually, but just a little tightening won’t do. To tighten your seat to the degree it won’t move, you’ll need to get it as tight as you can.
Now, if you have been using your bike for over 3 years, it’s very possible that the screw has become rusty, in which case, you will have to replace the screw from the clamp assembly.
3. Your Seat Post Clamp has Become Corroded or Dirty
Have you noticed that there are several components to a seat post clamp? Do you know what firmly holds these components in place? It’s a teeth-like mechanism.
For those bikes whose seats don’t sway or tilt at all, the credit mostly goes to this mechanism. But what happens if filth, such as mud or dust particles, gets lodged between the parts of a clamp? Friction will become too light to hold the seat in place at the desired seat angle.
If you’re wondering what “friction” is, it’s the force that works against the sliding of two objects over each other. This friction is very important when you’re riding your bike over wet surfaces.
What can you do to increase friction? Check to see if your seat post clamp has gotten worn out. If so, you’ll have to replace it.
If it’s all okay, then we would advise you to use some carbon assembly paste, which can be bought from any hardware supply store. Just tell any store associate what you’re trying to do, and they’ll show you what you need.
4. The Seat Stem is Too Loose
Okay, so we have already discussed what to do if your seat post tilts from front to back, but what does it mean if it slides up and down?
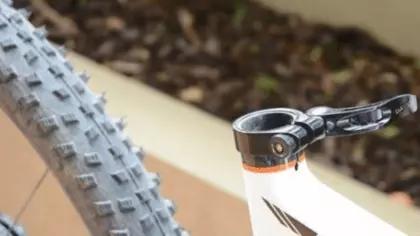
The most common reason for this is that the stem has become loose and needs some tightening. The bike’s seat stem is that long portion beneath the seat that goes into the frame. In newer models, the manufacturer may have used a lever to attach the stem and hold it in place.
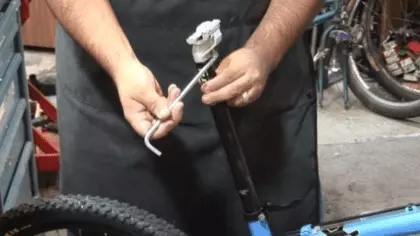
So, in order to tighten the nut and screw connection of your bike stem, which is kept in position with a lever, you will need an Allen wrench.
Depending on the model of your bike, you may also need some other tools, such as a pair of pliers and a screwdriver. We have included instructions for this problem in the section below.
How do You Fix These Loose Seat Issues?
In this section, you’ll note that some repairs are more likely to be needed than others based on the exact problem you’re experiencing, while other solutions will be applicable regardless.
Fixing a Bicycle Seat Clamp that has Become Loose
Our past experiences tell us that simply tightening the bolt of the seat clamp will often do the trick. So, if you haven’t done that yet, take a wrench and turn that bolt in a counterclockwise motion. Repeating this process once or twice should be enough to tighten it.
At that point, be sure not to overdo it. Don’t force it once it’s really tight; doing that, you could strip the grooves off the bolt, and then it will never hold.
Now, hopefully, this won’t be the case, but sometimes you’ll find that you are not able to tighten the bolt – that is, you keep screwing it in, but it never gets tight. If you find yourself in that scenario, then the bolt is probably already stripped.
Apologies in advance, but we don’t have a trick to fix a stripped bolt in bikes. You have no choice but to replace it with a new one.
If your bolt is not stripped, perhaps it has rusted over. In this case, get a cup of vinegar from the kitchen. No, no, don’t drink it; pour it in a little bowl, not a cup! It’s for soaking the nuts and screws. Letting them soak for half an hour or so should clean any rust from their surfaces.
But there is a drawback to doing this – the surface of these fastening parts will become a little rough, leading to the requirement of excessive torque to tighten them. So, just make sure you lubricate them right after the cleaning process.
Seat Post Moving Up or Down
If you have diligently followed all the instructions so far and your bike seat post still tilts, then it’s time to closely inspect the bike seat clamp. It’s likely that that’s the main culprit.
So, most trendy bike models contain stems and teeth that fit into each other. These teeth can become worn out. They can become rusty or dusty. Hence, leading to an uncomfortably tilting bike seat post.
If they are simply unclean, a little polish with soap, water, and a toothbrush should be enough. Some folks have even suggested lightly sanding the teeth to help clean them – a simple adjustment, you might say.
But what are you supposed to do if the teeth are worn out? Here are three options you can try:
- Filing Down the Clamp Teeth
Most people who filed down the narrow section between the teeth on their assembly have reported success from their efforts. If you have the necessary tools, this could work for you, too. But if you lack the right tools, your local bike shop may be able to assist you.
- Insert a Piece of Rubber
Sometimes there are tiny gaps between the seat post and the seat post clamp. What we need to do is cut up an old inner tube and use some small pieces of rubber to fill up those spaces. Why are we doing this? Solely to create enough friction to restrict the seat from moving around.
- Buy a New Adapter
Not knowing what bike model you ride, let me just say that some recent models give the opportunity to replace the old adapter if it stops functioning.
However, if that option isn’t available to you, then we regret to inform you that you will have to replace your entire seat post with a brand new one, and the saddle too.
We know it’s inconvenient to have to replace the seat post, but it’s the safest alternative. If you do find yourself in the situation of having to make this purchase, please note that many folks have remarked that two-bolt designs are greatly preferred over a single-bolt design.
Saddle Rails Swaying Forward or Backward
Okay, now this is a different story! We don’t have to worry about the post clamp, or the bike stems anymore. Our whole focus should now be on the loose saddle rails. It’s time to give them one hell of a tightening to make them fit enough for the seat post clamp.
Quickly take a moment to inspect the saddle area for debris or filth. If required, take your whole saddle off and disassemble your seat post clamp to have a look. Both the saddle rails and the seat post clamps should be checked.
Are the clamps soiled? If they are, then grab a bar of soap and a bucket of water and scrub it until it’s all shiny again.
You can also try wrapping rubber strips around the rails. This strategy, according to some riders, can last a lifetime.
Even if it turns out to be a more temporary fix for you, it’s still a quick and easy fix that should keep you riding happily for at least a few months. And for the proverbial cherry on top, you might even experience a little less vibration than before.
Friction Paste to the Rescue
It seems like we’re always receiving this one tip from serious bike riders everywhere. That tip is: “use friction paste to fix loose bike components,” and the most common example they give is to use it to prevent the tilting bike seat syndrome.
You may be asking yourself, what the heck is friction paste? Well, friction paste is basically some microscopic glass shards encased in a gel.
Because of its viscosity, we use it to increase the friction between two connecting pieces. The theory is that by applying less torque, you will increase friction and reduce slippage.
Are the Loose Nuts Driving You Nuts?
Here’s how you can easily tighten up loose bolts and nuts in the blink of an eye:
Take out your toolbox. Grab the screwdriver. And that wrench there. We may need the pliers as well.
Now, with the tip of your screwdriver, firmly hold the bolt in position. And take the wrench in your other hand and keep rotating the nut in a counterclockwise motion to firmly tighten the bolts and nuts.
Make sure you have adjusted the seat post according to the proper height for the rider. Here’s a Pro tip: only tighten the bolt enough to where the seat is not sloppy loose.
Have the rider sort of pretend to get on so you can find the perfect height and position of the seat. Then, completely tighten the bolts and nuts when you’re satisfied with the adjustment.
Related Article: What size bike should I get for my height
How to Fix a Loose Seat Attached to a Lever?
Don’t put your wrench back in the toolbox yet! We’ll need it again to tighten the lever, but this time, it will be a clockwise turn.
Make sure the lever handle is sturdy and straight. Otherwise, you won’t be able to adjust it according to your seat height. After making your best guesstimate adjustments, take your bike out for a short test run.
When riding, we need to understand if we have made the nut too tight. So, for this experiment, you should keep your leg straight on the downward arc of the pedal stroke. Then you gotta slightly bend the leg at the top of the arc. To stop, slowly press down on the handle. If you see it’s not folding, you know what’s wrong.
The only solution for this is to turn the handle a little bit in a counterclockwise direction (loosen it, in other words, but only a tiny bit). Make sure you do this while holding the nut in place with the wrench.
Continue until the lever is completely closed. Climb back on and re-measure things for your height. And simply open the lever and reposition the seat if you need to make more changes.
Read More: Best bike shorts
Let’s Make the Seat Post Greasy
You may wonder, “Wouldn’t grease make it slip even more?” and that question would make perfect sense. But in fact, the grease aids in the adhesion of the seat post to the seat tube surfaces. This allows the seat post to have more stability when you are riding your bike at high speed.
Not only that, greasing your seat post will also protect it from corrosion in the long run. So, how do we apply a thin greasy coat over the exterior of your seat post? Simple – you just use your fingers.!
After you are done greasing it up, don’t forget to put the seat post and seat clamp back in their original positions.
Final Thoughts
So from now on, you’ll never have to wonder again, “Why does my bike seat keep tilting?”
We understand how a tilting bike seat can ruin an otherwise good day of biking. But we are confident that by following our guidelines and DIY solutions if you ever face this problem again, you will be able to address it in short order, and stop randomly tilting issues!
However, if, after trying all of these tips, you still can’t figure out the cause of your seat tipping, we suggest seeking professional help at your local bike store.

Steve Beck is a passionate cyclist and experienced writer covering the cycling industry for over a decade. He has a wealth of knowledge and expertise in all bike-related things, from the latest products and technologies to the best routes and trails. His articles are well-researched, informative, and engaging, and he has a talent for explaining complex cycling concepts in a way that is easy to understand. Steve can be found on the road when he’s not writing about bikes, putting his knowledge and skills to the test.

