5 Best Bike Tubes in 2023
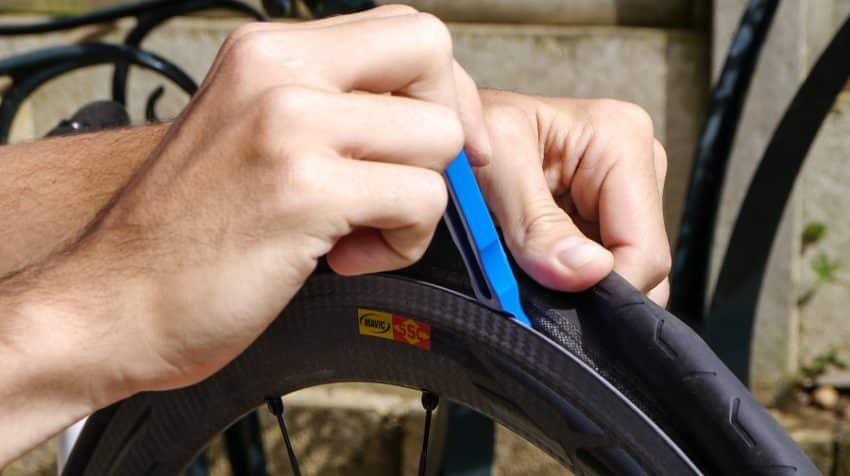
We know that you are probably thinking that bike tubes aren’t really the most exciting topic. And maybe they aren’t, but if you are into biking, or if you have ever been stuck with a flat bike tire and no tube, you know exactly how important a bike tube is.
At A Glance: Top 3 Picks For Best Bike Inner Tubes
Having the right tube for your bicycle can make a huge difference in the ride of your bike. There are a number of different tubes on the market that you can put in your bike tires, but how do you know which one is the right one?
| IMAGE | PRODUCT | |
|---|---|---|
Our Top Pick! 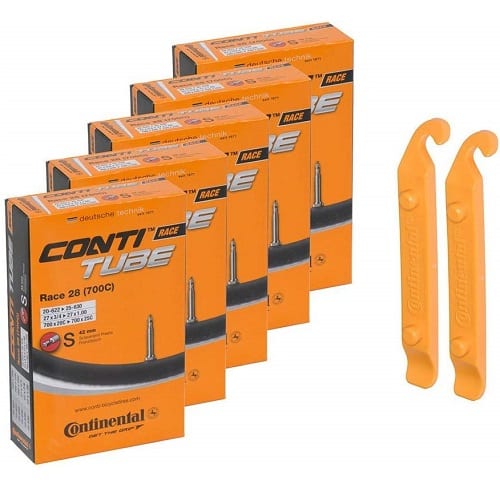 |
| VIEW LATEST PRICE→ |
 |
| VIEW LATEST PRICE→ |
 |
| VIEW LATEST PRICE→ |
Many long-time riders will tell you that the best way to know which tube works for you is by trial and error. However, trial and error aren’t fun if you get stuck on a long ride with a tube that doesn’t fit or isn’t a good option for your riding style.
You can also ask the folks at your local bike shop, but if they give you choices that might not match your riding style, you might not like what they suggest.
To help you navigate the world of bike tubes, and to help give you a good place to start when you are shopping for the best bike tube for your bike, we’ve done a bunch of research on many of the tubes available on the market today.
We’ve tried them out, we’ve put them through a variety of riding conditions, and we’ve come up with this list of the best bike tubes.
We’ve given you a variety of options, so there’s something here for every rider, whether you ride distance on the road, like to spend time on singletrack, or just want to cruise around town.
We’ve also researched some of the most commonly asked questions about bike tubes, and put all of the answers here, in one place, so you don’t have to do all that research on your own.
So, here we go… the best bike tubes on the market.
Best Bike Tubes
Continental Bicycle Tubes Race 28

- Wheel Size: 700×20/25
- Valve: Presta valve (42mm)
- Weight: 105g
- Material: Butyl tubes
- Package Dimensions: 7.4 x 6.5 x 3.2 inches
An all-purpose inner tube and excellent replacement inner tube for your road bike season, Continental’s Race 28 tube is a first-rate inner tube.
The new hose system makes it even easier to find the optimum hose for your needs. This very user-friendly hose system is perfectly adapted in design, valve type, and length to the respective tire sizes.
This value-priced bundle of five tubes is designed for 700c tires and comes with Presta valves and a couple of tire levers to add to your backup tools.
Continental’s high-quality butyl Race 28 Tube is perfectly suited to racing. Lightweight and durable, this tube is yet another solid addition to your cycling arsenal this season.
- Benefits: Pack of 5, offers a smooth ride, great value.
- Drawbacks: Weak valve cores.
- Extra features: 2 Continental tire levers
- Buying advice: This pack gives you 5 backup inner tubes for road bikes so you always have a spare.
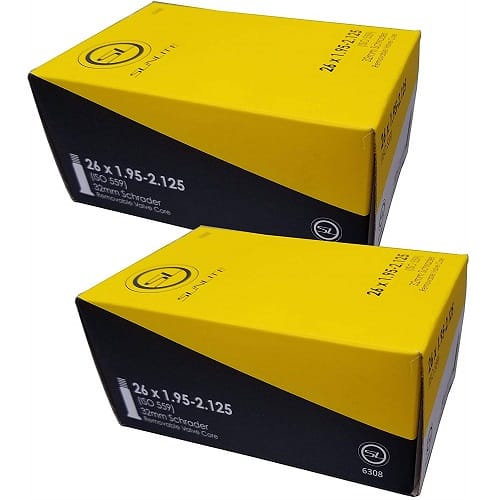
Street Fit 360 Tube

- Wheel Size: 26 x 1.95-2.125
- Valve: Schrader valve (32mm)
- Weight: 4.8 ounces
- Material: Butyl tubes
- Package Dimensions: 7.5 x 5 x 2.6 inches
If you’re looking for a two-pack of replacement bicycle inner tubes to throw in your bag, look at these lightweight tubes from Street Fit 360. These Schrader valve tubes easily install with a secure fitting to a 26’ tire size, all for a lower than average cost.
Street Fit 360 makes tubes for cruisers, mountain, urban, street, strollers, youth bikes, recumbents, and more, so you’ll be sure to be able to match a new tube to your tire with the same dimensions.
- Benefits: Easy to install, good value, secure fit.
- Drawbacks: Seam weld is a bit weak.
- Extra features: N/A
- Buying advice: For the health of your tire and tube always maintain the proper air pressure.
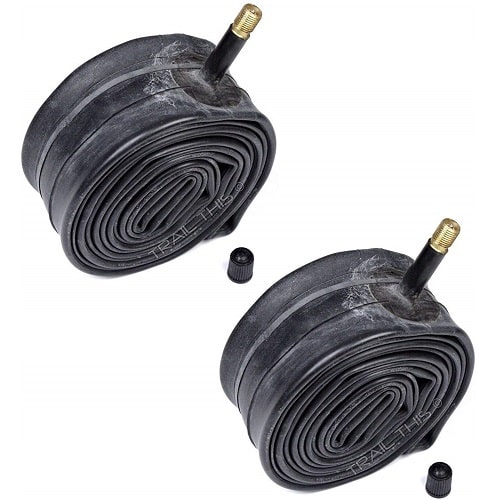
Kenda Bike Inner Tubes-Original Version

- Wheel Size: 26″ x 1. 90″ to 2. 125″
- Valve: Schrader Valves (32mm)
- Weight: 13.8 ounces for 2 tubes
- Material: Butyl rubber
- Package Dimensions: 7.5 x 5 x 2 inches
Think all bike tubes look the same? Compare a few brands side by side and you’ll see that Kenda tubes perform to the highest standards across numerous categories. Kenda has been building exceptional products for life’s most demanding activities for over 50 years.
The original Kenda inner tubes are perfect for mountain bikes, hybrid bikes, or cruisers. Although slightly heavier than others, they’re easy to install, durable, and a great tube for the price.
- Benefits: Low cost, thick material, good fit.
- Drawbacks: Heavier than others, can blow at low PSI.
- Extra features: 2-pack bulk packaging.
- Buying advice: No retail packaging is included so you save.
SCK 2 Pack 20 Inch Bike Tubes

- Wheel Size: 20″ X 1. 75″ To 2. 125
- Valve: Schrader (32mm)
- Weight: 5.1 ounces per tube
- Material: High butyl rubber
- Package Dimensions: 7.5 x 5.5 x 2 inches
This two-pack of inner tubes from SCK work and fit exceptionally on the mountain or hybrid bikes. They install easily and hold up to pathways and gravel roads remarkably well.
They come with easy to follow instructions on how to change a flat, and 2 tire levers to assist you in getting the tire off the rim. It never hurts to have a couple of spare tubes and these fit the bill nicely. They’re affordable, light, and come with a 100% satisfaction guarantee.
- Benefits: Great price, very easy to install, 2 pack.
- Drawbacks: The free levers are weak and thinner than others.
- Extra features: 2 Tire Levers
- Buying advice: Not 100% satisfied with your purchase? They will let you return them and get a full refund!
Bike a Mile Continental GatorSkin Bike Tires – with Continental Inner Tube

- Wheel Size: 700 x 25mm
- Valve: Presta Valve
- Weight: 240g
- Material: Polyester and butyl
- Package Dimensions: 27.9 x 10.2 x 10.2
If you are considering puncture-resistant, long-wearing tires and tubes, Continentals are the brand for you. Known worldwide for their excellent puncture protection, thanks to the PolyX Breaker puncture protection and DuraSkin lightweight sidewall protection.
In this combo pack, you get a set of Continental’s GatorSkin bike tires, two top quality, durable, and extra strong Continental inner tubes, as well as a reflective safety armband for night rides.
Although preferred by mountain bikers, these tubes are favored for commutes to work, sports rides, or winter training rides and will be a solid choice for preventing annoying puncture flats.
Now, if you’re not a casual biker but a serious rider looking for every edge, GatorSkins may not be the best choice, as there are lighter tires out there better suited for your needs.
However, if you are looking for tires with puncture protection, good value, durability, and top of the line tubes, this combination from Continental is a great solution.
- Benefits: Tire/tube combo, great fit, super durable.
- Drawbacks: Price, tires are weighty.
- Extra features: Comes with a reflective safety armband.
- Buying advice: No need to buy tubes and tires, this package has both and they fit great together.
RELATED: Presta Valves Or Schrader Valves
Bike Tube FAQ
So now that you’ve learned a little bit about the tubes that we think are best, it’s time for us to give you the answers to the most commonly asked questions about bike tubes, that we’ve found on the internet.
We did all of the research, and put all of the answers in one place, so that you don’t have to work too hard, to get the information that you need.
What Size Bike Tube Do I Need?
Selecting the right size tube is really important to ensure that you have a comfortable ride, but it’s also important to ensure that you don’t end up miles from home or from your car, with a flat tire.
Tubes that are too small, are likely to pop under the pressure of your bike, and tubes that are too big, will pinch and end up with punctures. In both of these cases, you end up with a flat time, and that is never a good thing.
Selecting the right size tire is the best way to ensure that you don’t end up with a flat tire that could have been prevented.
There are two factors that you need to consider when you are shopping for a tube for your bike tires. These are Diameter and Width.
Both of these numbers can be found on the sidewall of your bike tires or printed on the tube that is already installed on your bike. When you look at your bike tire, the size will be marked like this: Diameter X Width.
It is important that you match your new tube as closely as possible to the existing tube. Wheel diameters come in a variety of sizes, with 20, 24, 26, 27.5, and 29 being the most common.
You may also see 700c as a tire diameter. You need to match the diameter of your tire exactly. If you don’t get the right diameter, you risk popping or pinching your tube.
Tire width comes in a range of sizes. Each tube will show a width in inches that covers a small range. For example, one of the most common tube sizes is 26 X 1.75-2.125.
This means that the tire is 26 inches in diameter, and will fit a tire in the range of 1.75 inches to 2.125 inches. The width of your tire does not need to be exact since tubes will stretch a little.
How Do You Fix A Bike Tube?
If you’ve had the unfortunate experience of having a bike tire go flat, you know that you have two options for fixing this problem. You can either replace the tube or fix the tube. When you are on the road or trail, it is often more convenient to carry a tube repair kit, than haul around a spare tube.
Your local bike shop will carry commercially packaged repair kits that have all of the supplies that you need, in one small, light-weight package. These kits also come with detailed instructions, so that when you are in the field, you don’t have to wonder which step comes first.
It is also good to carry water and a small cloth, paper towels, or facial tissue with your repair kit. This will come in handy while you’re making your repair.
It’s good to know how to fix your tube, before you are sitting on the side of the trail, with a flat tire. Here are the basic steps to repairing your bike tube:
- Find the damage to your tube. (We’ll discuss this process later in this article.)
- Use a bit of water and clean the area around the damage. A dirty tube will not allow the adhesive in the patch kit to adhere well to the tube. Make sure you dry the area well before starting the repair.
- Using the bit of sandpaper included in your patch kit, rough up the surface of the tube around the damage. This will give a good surface for the adhesive to stick to. You don’t have to scrub too hard, however. Too much roughing will thin the tube, and create a weak spot, that could split when you are riding.
- Spread the adhesive on the tube in the area of the damage. Let the glue set for a few seconds, allowing it to become a bit tacky.
- Apply the patch over the damaged area. Hold the patch in place with a bit of pressure, to ensure that it sticks fully to the tube.
- Give the adhesive a few minutes to dry before inflating the tube and putting it back into your tire. This will keep the patch from slipping from the tube or from peeling off inside the tire.
Once you’ve patched your tube, you can place it back in the wheel and tire, fully inflate it, and put the wheel back on your bike. With practice, this process should only take a short time to complete, and you’ll be back riding in no time.
How To Replace A Bike Tube?
In some cases, fixing your bike tube isn’t an option. If your tube has split, or if the valve stem is cracked or damaged, you will need to replace your tube. Sometimes replacing your tube is the best option if you’ve experienced a slow leak, and can’t find any obvious holes or damage.
To replace your bike tube you will need a few tools:
- Tire levers
- Spare tube
- Pump
- Adjustable wrench (if you have bolt-on wheels, you’ll need this.)
The first thing you will need to do before replacing your tube removes the tire from the bike. This will require you to release the brakes and lose the wheel from the fork. Once you have the wheel removed from the frame, deflate the tube so that you can easily pull the tube from the tire.
To remove the tube from the tire, use tire levers to gently pry the tire bead away from the rim of the wheel. You don’t need to completely remove the tire from the wheel to remove the tube.
To remove the tube, first, look to see if there is a small washer holding the valve stem secure. If there is, remove this first. Once the washer is removed, push the valve stem gently through the hole of the wheel.
With the valve stem released from the wheel, the rest of the tube should be easy to pull from the tire.
With the tube removed, carefully inspect the tire and wheel for sharp objects such as thorns, rocks or spoke connections. Make sure these are removed or repaired before installing your new tube, or you’ll quickly end up with another flat tire.
To install the new tube, start by inflating the tube just a little. It is easier to install a slightly round tube, than a completely flat tube. Next, set your valve stem in the hole in the wheel, and secure the washer if necessary.
This will keep your tube from sliding around, and the valve stem getting in the way while you are setting the tube in the tire. Gently tuck the tube into the tire, a small section at a time, and be careful to not twist the tube.
Once the tube has been completely set inside the tire, you can reinstall the tire. To do this, set the tire back into the tire bead, starting at the valve stem, and working around to the opposite side.
The last little bit of the tire may be difficult to set in the tire rim, so use your bike levers to gently pry the last section of the tire bead into the rim.
With the tube and tire replaced, fully inflate your tire, reinstall your wheel on the frame, and close the brakes. Your bike is now ready to ride.
How Do I Find A Leak In My Bike Tube?
There is nothing worse than getting a hole in your bike tube. It can be even more frustrating when you’re out on the trail or road and a flat tire leaves you stuck. There are a lot of reasons that you can get a hole in your tube.
These can include plant stickers, improperly sized tubes, loose spoke, or even just sharp rocks. When you do get a flat tire, you’ll want to either replace the tube or fix your tube. Fixing your tube, especially if the hole is small is often the most practical choice.
However, one of the biggest challenges to fixing your bike tube is finding the leak. If the hole is small, you may not be able to see it, unless your tire has obvious signs of damage, such as a plant sticker or thorn in the tire, or another sign of puncture, and you can locate the hole in this manner.
If you can’t easily find the hole, you are going to need to have some techniques in your pocket to help you find where the tube is damaged, before you can fix it.
Once you’ve removed the tube from the tire, there are a few things that you should do, that can lead you to the location of the leak. First, check the inside of the tire for sharp objects. Sometimes small thorns can go all the way through the tire, puncturing the tube.
If you’ve left your tube in the same place in the wheel, you should be able to find the location of the leak fairly easily. Second, if you cannot find a sharp object in the tire, check the valve stem. If your valve stem has become damaged or is cracked, this could be the source of the leak in your tube.
Third, if you can’t find a sharp object in the tire, and your valve stem is not damaged, check the wheel for loose spokes. If you’ve had a hard landing or hit a rock, you may have caused a spoke to come loose inside the tire.
The ends of the spokes can be very sharp and may puncture your tire. If none of these is the answer, then you’re going to need to take other measures to find the leak.
If you can wait until you get home to find the leak, or if your tire has a slow leak, you can use the bubble test to find a leak in your tube. To do the bubble test, you will first need to remove the tube from the wheel and tire.
Once the tube has been removed, fill a decent-sized, shallow container (a sink or a shallow storage container are great options) with soapy water.
Then, if you can, partially fill the tire with air, so that you have some pressure to work with. Submerge a portion of the tire in the soapy water, and squeeze gently on the tube. Look for bubbles.
If you don’t see bubbles, rotate the tire in the water, and repeat the process until you find the leak. Once you’ve found the leak, remove the tire from the water, and dry off the tube before applying a patch.
If you are on the road or trail, and you’ve not had luck finding anything sharp in your wheel or tire, you are going to need to remove the tube and locate the leak.
Similarly to the bubble test, the first step to finding a leak in your tube when you’re on the road is removing the tube from the tire and wheel.
Then, if possible, slightly inflate the tire so that there is a bit of pressure in the tube. Hold the tube close to your face, near your eyes or nose is best (these areas are really sensitive) and while gently squeezing the tube, rotate the tube, using your skin to feel for air passing out of the tube.
When you feel a slight amount of air on your skin, you’ve found your leak.
Why Do Bike Tires Go Flat When Not In Use?
This is a common frustration for bike riders that might be hanging up their bike during the winter, or for the rider that likes to switch between bikes. You let your bike sit for a while, and the tires go flat.
Now the first explanation could be, that you have a very small hole in your tire that has caused a slow leak.
It might not have been a big enough hole to cause issues when you were riding your bike, but as it has set for a while, not being used, the small hole has released enough air to make the tire go flat.
The second explanation has more to do with science. If you notice, over time, even car tires, on a vehicle that isn’t driven frequently, will go flat.
This process will also happen, over a shorter time with your standard balloon. It is important to note that your bike tube is not completely impermeable. It has very tiny gaps that you cannot see with the naked eye, or even a really good microscope.
Over time, when your bike sits unused, the air molecules (which are very, very small) inside your tire will eventually pass through the rubber of your bike tube.
The best remedy to this problem? Even if you aren’t using your bike, periodically check the pressure, and add some air to the recommended PSI, so your tires maintain pressure.
There you have it. Our favorite bike tubes, and the answers to your burning questions about bike tubes. Hopefully, we’ve given you a great place to start when you’re out shopping for tubes.
And we hope that our FAQs have given you helpful information for installing, replacing, and repairing your bike tubes. Now, you should be ready for any biking adventure, without having to worry about being stuck with a flat tire.
So, now, it’s time for you to get out and enjoy the ride!
Did we miss something? Do you have a tube you think is great?
Let us know your thoughts in the comment section.

Steve Beck is a passionate cyclist and experienced writer covering the cycling industry for over a decade. He has a wealth of knowledge and expertise in all bike-related things, from the latest products and technologies to the best routes and trails. His articles are well-researched, informative, and engaging, and he has a talent for explaining complex cycling concepts in a way that is easy to understand. Steve can be found on the road when he’s not writing about bikes, putting his knowledge and skills to the test.




Thanks a great deal. I’ll highly appreciate if you will srnde good updates on bikes on regular basis.
I ALWAYS keep a spare tube ahead of myself so when i get a puncture, I can slap the old repaired tube in and am ready to roll within a few minutes. Then I can patch the old one that evening and leave it hanging up in the wardrobe so the patch can cure properly over the space of a few days or more. Personally, I recommend Cure-C-Cure or Tip Top patches.